Mixing Concrete by Hand: There is a primal satisfaction in building something with your own two hands. It’s a connection to our ancestors, who stacked stones to create shelter and monuments. In the modern world, that connection is often found in the simple, gritty, and profoundly transformative act of mixing concrete.
Forget the roaring diesel engine of the ready-mix truck for a moment. Forget the clattering drum of a rented electric mixer. We’re talking about something more fundamental: a shovel, a wheelbarrow, and the raw ingredients of civilization itself. Mixing concrete by hand is a rite of passage for the serious DIYer, a skill that separates the assemblers from the true builders. It’s not just manual labor; it’s an exercise in chemistry, physics, and patience. It’s a craft.
This isn’t just a quick “how-to.” This is a deep dive. We are going to explore the soul of concrete, from the microscopic crystals that give it strength to the Zen-like rhythm of folding sand, stone, and cement together. By the time you’re done reading, you won’t just know how to mix a batch of concrete; you’ll understand why it works, how to perfect it for any job, and how to troubleshoot it like a seasoned pro.
So, grab your gloves, put on your boots, and let’s get our hands dirty. Welcome to the alchemist’s art.
Part 1: Why Bother? The Case for Hand-Mixing in a Mechanized World
In an age of convenience, why would anyone choose the strenuous path of mixing concrete by hand? It seems archaic, like churning your own butter or forging your own nails. But the seasoned builder knows there are powerful, practical reasons why this skill is not just relevant but essential.
1. The Reign of the Small Job:
The most common reason is scale. Do you need to set a single fence post? Anchor a mailbox? Repair a cracked step? Create a small pad for a garbage can or an A/C unit? For these tasks, ordering a minimum of one cubic yard of ready-mix concrete is like using a fire hose to water a houseplant. It’s wasteful, expensive, and creates a logistical nightmare. Hand-mixing allows you to create the exact amount you need, when you need it, with zero waste.
2. The Virtue of Control:
When you mix by hand, you are the master of the material. You control the consistency, the ratio, and the quality of every single batch. Is the sand a little damp from last night’s rain? You can adjust the water accordingly. Need a slightly stiffer mix for a sloped repair? You can fine-tune it shovel by shovel. This level of granular control is impossible when a truck pulls up and starts pouring. You become a chef, not a line cook, adjusting the recipe to perfection.
3. The Freedom of Accessibility:
Concrete mixers need power. Ready-mix trucks need a wide, solid path to the pour site. What if your project is at the back of a sprawling garden, down a steep hill, or in a remote location with no electricity? The hand-mixing toolkit—a wheelbarrow, a shovel, and some buckets—is the ultimate all-terrain vehicle. It can go anywhere you can, granting you the freedom to build wherever you envision.
4. The Economics of Sweat Equity:
Let’s be blunt: it’s cheaper. For small to medium-sized projects, the cost of buying individual bags of cement, sand, and gravel is significantly lower than the price of a short-load delivery, which often comes with hefty fees. The difference in price is paid for with your own effort, a concept known as “sweat equity.” You are literally turning your labor into a physical, lasting asset.
5. The Intangible Reward:
There is a profound, almost spiritual, satisfaction that comes from transforming grey dust and common stones into a rock-hard, enduring structure. The rhythmic scrape of the shovel, the gradual change in texture as the mix comes to life, the feeling of the material under your control—it connects you to your work on a deeper level. You didn’t just pay for it; you made it. That feeling of accomplishment is something no amount of money can buy.
Part 2: Know Your Ingredients – The Sacred Trinity of Concrete
Concrete appears simple, but its strength comes from a beautiful chemical reaction between three core components. Understanding the role of each is the first step to becoming a concrete connoisseur. Think of it like a three-legged stool: remove one, or get the proportions wrong, and the whole thing collapses.
1. Portland Cement: The Magic Glue
This is the hero ingredient, the binder, the alchemical powder that makes everything happen. It is not, as many believe, the same thing as concrete. Cement is to concrete what flour is to bread—the essential, active ingredient.
When Portland cement is mixed with water, it undergoes a chemical reaction called hydration. This reaction forms billions of microscopic, interlocking crystals that bind the other ingredients together in a dense, solid matrix. This isn’t a “drying” process; it’s a chemical curing process that actually consumes the water. That’s why concrete can harden underwater. The quality of your cement is paramount. Always use fresh, dry, lump-free cement from a sealed bag. Old, hardened cement has already partially hydrated and has lost its power.
2. Aggregates: The Mighty Skeleton
Aggregates are the inert fillers that give concrete its bulk, strength, and stability. They typically make up 60-75% of the concrete’s volume. Using aggregates is crucial for two reasons: they are much cheaper than cement, and they create a stronger, more stable final product that is less prone to shrinkage and cracking. Aggregates are divided into two categories:
- Fine Aggregate (Sand): Typically “sharp sand” or “builder’s sand.” Its role is to fill the tiny voids between the larger stones. Imagine a jar full of golf balls—there’s a lot of empty space. The sand is like pouring in tiny beads that fill those gaps, creating a denser, more cohesive mix.
- Coarse Aggregate (Gravel or Crushed Stone): This is the real muscle. These larger particles (typically up to ¾ inch or 20mm) form the structural skeleton of the concrete, providing compressive strength and resisting forces. The interlocking of these stones is what prevents the concrete from being brittle.
3. Water: The Catalyst of Creation
Water is the spark that ignites the chemical fire of hydration. But it’s a fickle friend. The amount of water you use is the single most critical factor in determining the final strength of your concrete. This is known as the water-to-cement ratio.
- Too little water: The hydration process will be incomplete. The mix will be stiff, unworkable, and full of air pockets (honeycombing), resulting in weak, porous concrete.
- Too much water: This is the most common mistake DIYers make. Soupy, wet concrete is easy to pour and finish, but the excess water creates larger spaces between the cement particles. As the concrete cures, this excess water evaporates, leaving behind microscopic voids that dramatically weaken the final product. It also increases the risk of shrinkage, cracking, and surface dusting.
The golden rule is simple: Use only the minimum amount of water necessary to make the mix workable. A good concrete mix should not be pourable like soup. It should be a thick, cohesive mass, often described as having the consistency of thick oatmeal or stiff peanut butter.
Part 3: The Armory – Assembling Your Toolkit
A craftsman is only as good as their tools. Fortunately, the tools for hand-mixing concrete are simple, rugged, and relatively inexpensive.
Essential Gear:
- Mixing Surface: Your “arena.”
- Plastic Wheelbarrow: The undisputed champion for most DIY jobs. It’s at a good working height, it’s mobile, and its rounded shape makes mixing easy. A plastic one won’t rust and is easier to clean.
- Builder’s Mixing Tub/Tray: A large, low-sided plastic tub that sits on the ground. Excellent for larger batches and allows for a wide mixing area.
- Tarp or Plywood Sheet: A last resort, but viable. It’s harder to control the water and mix thoroughly, but it works in a pinch.
- Measuring Implements: Consistency is key.
- Buckets: The best way to ensure accurate ratios. Use a sturdy builder’s bucket and use it for everything—one bucket of cement, two buckets of sand, three buckets of gravel.
- Shovel (for rough measurement): You can measure in “shovelfuls,” but be consistent. Each shovelful should be roughly the same size and fullness. The bucket method is far more accurate.
- Mixing Implements: Your weapons of choice.
- Square-Headed Shovel: The flat edge is perfect for scraping the sides of the wheelbarrow and “cutting” into the mix.
- Builder’s Hoe or “Mud Hoe”: A hoe with a sturdy head, often with two holes in it, is fantastic for pulling and pushing the material. It’s arguably the most efficient hand-mixing tool.
- Water Source:
- Hose with a spray nozzle: Allows for fine control over water addition.
- Watering Can or Buckets: If a hose isn’t available, this provides a measured way to add water slowly.
Crucial Safety Equipment (Non-Negotiable):
Concrete work is not benign. Wet cement is highly alkaline (caustic) and can cause severe chemical burns that are often painless at first but can lead to third-degree tissue damage. Cement dust contains silica, which is harmful to your lungs.
- Waterproof Gloves: Heavy-duty rubber or nitrile gloves are essential to protect your skin from burns.
- Safety Glasses or Goggles: A single splash of wet concrete in your eye can cause permanent damage.
- Dust Mask or Respirator: A P95 or N95-rated mask is critical when handling dry cement powder to protect your lungs from silica dust.
- Long Sleeves and Pants: Cover all exposed skin.
- Steel-Toed, Waterproof Boots: Protect your feet from both impact and chemical burns. If concrete gets in your boot, stop immediately, take it off, and wash your foot thoroughly.
Part 4: The Sacred Ratios – Recipes for Rock
The ratio of cement to sand to gravel determines the final properties of your concrete. Different jobs require different recipes. The ratio is always expressed in the order: Cement : Sand : Gravel.
- 1:2:3 – The All-Purpose Champion:
- Use for: General purpose slabs, walkways, foundations for small sheds, setting sturdy posts in firm ground.
- Characteristics: This is your go-to mix. It provides an excellent balance of strength, workability, and cost-effectiveness. It’s strong enough for most household and garden projects.
- 1:3:4 – A Leaner, Bulkier Mix:
- Use for: Filling large voids, mass concrete foundations where high strength isn’t the primary concern.
- Characteristics: A more economical mix because it uses less of the expensive cement. It’s perfectly adequate for situations where the concrete is primarily acting as a heavy, stable mass.
- 1:1.5:2.5 – The High-Strength Contender:
- Use for: High-traffic areas, steps, thin slabs, countertops, or any application needing maximum durability and a fine finish.
- Characteristics: A richer mix with a higher proportion of cement. This creates a stronger, denser, and more weather-resistant concrete. It’s more expensive to make but worth it for critical applications.
What About Mortar? A Quick Detour.
It’s important not to confuse concrete with mortar.
- Mortar (Ratio ~ 1:3 or 1:4 Cement to Sand): Used for “gluing” bricks or blocks together. It contains no large aggregate (gravel), making it smooth and sticky.
- Concrete (Ratio ~ 1:2:3 Cement to Sand to Gravel): Used as a structural mass. The gravel is essential for its compressive strength. Using mortar where you need concrete will result in a weak, brittle structure that will fail.
Part 5: The Main Event – The Step-by-Step Mixing Ritual
This is where theory becomes practice. We’ll use the 1:2:3 ratio and a wheelbarrow as our example.
Step 0: Mise en Place – Preparation is Everything
Just like a chef prepares their ingredients before cooking, a good concrete worker prepares their site before mixing.
- Prepare your forms/hole: Your destination for the concrete should be 100% ready to go. You have a limited working time once water is added.
- Gather your tools: Have everything—shovel, hoe, buckets, water source, safety gear—within arm’s reach.
- Stage your materials: Place your piles of sand and gravel and your bag of cement close to your mixing station.
- Check the weather: Avoid mixing in freezing temperatures or the extreme heat of midday if possible.
- Dampen your surface: Lightly spray the inside of your wheelbarrow with water. This prevents the dry mix from sticking and sucking moisture out of your first batch.
Step 1: The Dry Blend – Creating the “Volcano”
The key to strong concrete is a thorough, homogenous mix. This starts with the dry ingredients.
- Measure Your Aggregates: Using your bucket, measure out your sand and gravel first. For a 1:2:3 ratio, you might start with 2 buckets of sand and 3 buckets of gravel. Add them to the wheelbarrow.
- Mix the Aggregates: Use your shovel or hoe to briefly mix the sand and gravel together. This helps ensure the sand is already starting to fill the voids.
- Add the Cement: Now, measure 1 bucket of cement and add it on top of the aggregates.
- The First Dry Mix: This is a crucial, often-skipped step. Thoroughly mix all the dry ingredients together until you have a consistent, uniform grey color. There should be no streaks of brown sand, white cement, or pockets of plain gravel. You are coating every single particle of sand and stone with cement powder.
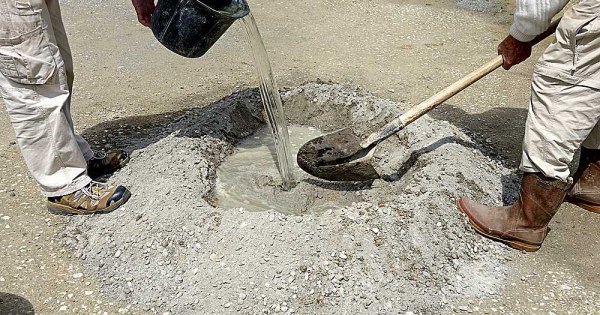
Step 2: The Water – Adding the Spark of Life
- Form the Crater: Use your shovel to shape the dry mix into a “volcano” with a hollow crater in the center. This helps contain the initial addition of water and prevents it from running off.
- The First Pour: Add about half to two-thirds of the estimated water you’ll need into the crater. Do not just dump it all in at once! This is the single biggest mistake you can make.
- Start Folding: Begin pulling the dry mix from the sides of the volcano into the central pool of water with your shovel or hoe. Don’t splash. The goal is to let the dry material absorb the water gradually.
Step 3: The Art of the Fold – Bringing the Mix to Life
This is a process of turning, chopping, and folding. It’s a rhythm.
- Work from the Bottom Up: Scrape the shovel along the bottom of the wheelbarrow and lift the material, turning it over on top. This ensures the dry material at the bottom gets incorporated.
- Cut and Chop: Use the edge of the shovel to chop into the mix, breaking up any clumps.
- Scrape the Sides: Continuously scrape the sides of the wheelbarrow to ensure no dry pockets are left behind.
- Observe and Assess: As you mix, the consistency will change from a lumpy, wet mess to a more uniform, paste-like material. It will still look too dry at this point.
Step 4: The Final Tempering – Achieving Perfect Consistency
Now you will add the rest of the water, but do so sparingly. Add a small amount—a cup or two at a time—mix thoroughly, and then assess.
- The Goal: You are looking for a mix that is stiff but workable. It should hold its shape when you scoop it with a shovel, but still be easy enough to place and compact in your forms.
- Visual Cues: The mix should have a slight sheen to it, but not be watery. All the aggregate should be completely coated in the cement paste.
- The “Slump Test” (DIY Version): A simple field test can tell you if you’re close.
- The Ball Test: Grab a handful (with your gloved hand) and form a ball. It should hold its shape without crumbling (too dry) or slumping flat (too wet). When you gently toss it an inch into the air and catch it, it should stay together.
- The Shovel Test: Scoop a shovelful and tap the handle. The concrete should slump slightly and look like a smooth, thick paste. If it runs off the shovel, it’s too wet. If it’s a jagged, crumbly pile, it’s too dry.
Step 5: The Final Mix and Go-Time
Once you’ve reached the perfect consistency, give the entire batch one last, thorough mix for about two more minutes. Ensure you’ve scraped the bottom and sides one last time.
Now, the clock is ticking. You typically have about 60-90 minutes of “pot life” before the concrete starts to stiffen and become unworkable. Get it from the wheelbarrow to its final destination without delay.
Part 6: Troubleshooting – The Concrete Doctor
Even with careful work, things can go awry. Here’s how to diagnose and fix common problems.
- Problem: My mix is too wet! (“The Soup”)
- Symptom: The mix is soupy, watery, and won’t hold its shape.
- Cause: You added too much water.
- The Fix: This is tricky but salvageable. You must add more of all the dry ingredients in their correct ratio. Do NOT just add more cement powder. This will create a weak, cement-rich mix that is prone to cracking. Add a little of your 1:2:3 pre-mix (a scoop of gravel, a scoop of sand, half a scoop of cement) and mix it in until the desired consistency is reached.
- Problem: My mix is too dry! (“The Crumbles”)
- Symptom: The mix is crumbly, stiff, and difficult to work with. There are dry pockets.
- Cause: Not enough water.
- The Fix: This is an easier fix. Add water, but do so very cautiously. Use a spray nozzle or add it by the cupful. A little water goes a long way at this stage. Mix thoroughly after each small addition until you reach the right workability.
- Problem: There are dry pockets and streaks!
- Symptom: You can see unmixed sand, cement, or uncoated gravel in the final mix.
- Cause: Insufficient mixing.
- The Fix: The only fix is more work. Put your back into it and mix until the color and texture are completely uniform. This is why the initial dry mix and the systematic folding are so important.
Part 7: Beyond the Basics – Pro-Level Knowledge
Mastered the basics? Here’s how to elevate your concrete game.
Estimating Quantities:
Running out of concrete halfway through a pour is a disaster. Here’s the simple math to avoid it:
- Calculate the volume you need in cubic meters (or cubic feet). Volume = Length x Width x Depth. (Make sure all your units are the same, i.e., all in meters or all in feet).
- Add a 10% buffer for waste and uneven ground. Total Volume = Volume x 1.1.
- Use an online concrete calculator. They are invaluable for converting your volume into the number of bags of cement, sand, and gravel you’ll need to buy.
Weather is a Factor:
- Hot Weather Concreting: The heat accelerates the hydration process, reducing your working time and potentially causing surface cracking.
- Keep your aggregates in the shade and spray them with cool water before mixing.
- Use cool mixing water.
- Work in the cooler parts of the day (early morning/late evening).
- Have everything ready to go to minimize delays.
- Cold Weather Concreting: If the temperature drops below 40°F (5°C), the hydration process slows dramatically and can stop. If the water in the concrete freezes, it expands, destroying the internal structure.
- Avoid pouring if a frost is expected within 48 hours.
- Use hot (not boiling) water for mixing.
- Cover the finished concrete with insulating blankets to trap the heat generated by the hydration process.
Curing is Not Drying:
This is the final, and most critical, step in achieving strong concrete. After you’ve placed and finished your concrete, you must ensure it stays moist for the first 3-7 days. The chemical reaction of hydration requires water. If the surface dries out too quickly, the reaction stops, and the surface will be weak, dusty, and prone to cracking.
- Methods of Curing:
- Misting: Periodically spray the surface with a fine mist of water.
- Covering: Cover the slab with plastic sheeting or wet burlap, weighing down the edges to trap moisture.
- Ponding: For flat slabs, you can create a small earth dam around the edge and flood the surface with an inch of water.
This one step, more than any other, separates amateur work from professional, durable results.
Part 8: The Clean-Up – The Unsung Hero of the Job
Your work isn’t done when the concrete is placed. A clean worksite is a safe worksite, and clean tools last a lifetime.
- Clean Immediately: Clean your wheelbarrow and tools immediately after you’re finished. Once concrete starts to harden, it’s exponentially harder to remove.
- Use Water and a Stiff Brush: A hose and a stiff-bristled brush are your best friends. Scrape off the thick residue first, then scrub everything clean.
- Responsible Disposal: Never wash wet concrete slurry down a storm drain. It will harden in the pipes. Find a discreet corner of your yard where you can wash your tools and let the grey water soak into the ground. Dump any small leftover amounts of wet concrete onto a piece of cardboard or plastic; once it hardens, you can dispose of it as solid waste.
Conclusion: More Than Just a Mix
We’ve traveled from the science of hydration to the feel of a perfect mix in a wheelbarrow. We’ve learned that mixing concrete by hand is not a chore to be endured, but a skill to be honed. It’s a dance of chemistry and physics guided by your own hands and intuition.
The next time you see a humble bag of cement, don’t just see grey dust. See the potential within it. See the fence post that will stand firm for decades, the small patio where your family will gather, the repaired step that makes your home safer.
By choosing to mix by hand, you are choosing control, self-reliance, and a deeper connection to the very fabric of what you build. You are no longer just a homeowner; you are an alchemist, turning dust, stone, and water into something solid, useful, and enduring. Now, go build something that lasts.