DIY Concrete Countertops: In a world of mass-produced granite, quartz, and laminate, there is a quiet rebellion taking place in our kitchens. It’s a movement away from the sterile and predictable, and toward something with texture, with soul, with a story. It’s a movement built on a material we often see but rarely appreciate: concrete.
A concrete countertop is not something you simply buy. It is something you create. It is a testament to patience, a monument to meticulous effort, and a celebration of imperfection. Each one is a bespoke masterpiece, bearing the subtle marks of its maker. It is a surface that evolves, earning a patina over time, telling the story of the meals prepared and the conversations shared upon it.
This is not a project for a weekend warrior looking for a quick fix. This is an undertaking. It will test your skills, challenge your patience, and cover your workspace in a fine layer of gray dust. It is messy, it is heavy, and it is unforgiving of haste.
But for those who are willing to embrace the process, the reward is unmatched. You will create a functional piece of art that is the undeniable heart of your home. You will become a modern-day alchemist, transforming humble bags of powder and stone into a surface of remarkable beauty and strength.
This is not a quick-and-dirty tutorial. This is your comprehensive masterclass. We will walk through every single step, from the philosophical “why” to the nitty-gritty science of sealing. So, take a deep breath, clear your mind, and prepare to craft a legacy in liquid stone.
Part 1: The Soul-Searching Phase – Is This Project Really For You?
Before you buy a single bag of concrete, we need to have an honest conversation. The internet is filled with glossy photos that make this project look deceptively simple. The reality is far more complex. Ask yourself these questions with brutal honesty:
- Are you patient and meticulous? Concrete work is 90% preparation and 10% high-stakes action. If you rush the mold-making or get impatient during the finishing stages, the flaws will be literally set in stone.
- Do you have the right space? You need a large, flat, sturdy workbench in a space that can get incredibly messy. A garage or workshop is ideal. This is not an apartment balcony project.
- Are you comfortable with multiple disciplines? This project requires skills in:
- Precise Measurement & Templating: “Measure twice, cut once” is an understatement.
- Carpentry: You need to build a waterproof, perfectly square, and incredibly strong mold.
- Chemistry: You’ll be mixing ingredients to precise ratios.
- Heavy Lifting: A small kitchen countertop can weigh 300-500 pounds. You will need a team of strong friends for the installation.
- Artistic Finishing: The final look comes from a delicate, multi-stage process of grinding and polishing.
- Are you okay with imperfection? Part of the beauty of concrete is its “wabi-sabi” nature—the acceptance of transient and imperfect beauty. You will likely have small pinholes, slight color variations, and other minor “flaws.” If you are seeking the uniform perfection of manufactured quartz, this is not the project for you. These aren’t flaws; they are character.
If you answered “yes” to these questions, then welcome. You have the mindset of a concrete artisan.
Part 2: The Fork in the Road – Pre-cast vs. Pour-in-Place
There are two fundamental ways to create concrete countertops. This is your first major decision, and it will dictate your entire workflow.
Method 1: Pre-cast (The Recommended DIY Method)
This involves building a mold in your workshop, pouring the concrete into it, and then—after it cures—flipping the finished slab and installing it onto your cabinets.
- Pros:
- Ultimate Control: You are working on a stable workbench, not hunched over your kitchen cabinets.
- Superior Finish: The smoothest, most perfect surface of the countertop comes from the bottom of the mold. The melamine mold face creates a near-flawless, glass-like finish that is the perfect starting point for polishing.
- The Mess is Contained: All the mixing, pouring, and grinding happens in your workshop, not your kitchen.
- Less Risk to Your Home: No chance of a catastrophic leak from the mold onto your floors and cabinets.
- Cons:
- The Flip: This is the big one. You have to de-mold, lift, and flip a very heavy, relatively fragile slab of concrete without breaking it.
- Seams: For L-shaped kitchens or long runs, you will need to pour multiple pieces and will have seams.
- Complex Molds: Molds for sink cutouts are built in reverse and can be tricky to visualize.
Method 2: Pour-in-Place
This involves building the mold directly on top of your kitchen cabinets, lining the room with plastic, and pouring the concrete right where it will live.
- Pros:
- Seamless: You can create large, continuous, monolithic countertops with no seams.
- No Heavy Lifting: No need to move the finished slab.
- Authentic, Raw Look: The top surface is hand-troweled, which can create a more rustic, organic finish.
- Cons:
- The Mess is Monumental: Your kitchen becomes a full-blown construction zone for weeks. Concrete dust is insidious.
- Incredibly High Risk: If your mold leaks, you could ruin your cabinets, floors, and sub-floors.
- Inferior Finish: A hand-troweled finish will never be as smooth or dense as a mold-cast finish. It’s much harder to get a professional look.
- Ergonomics from Hell: All finishing work—troweling, polishing—is done in place, often in awkward positions.
The Verdict: For 99% of DIYers, especially first-timers, pre-cast is the way to go. This guide will focus on the pre-cast method as it offers the highest chance of a professional-quality result.
Part 3: The Blueprint – Templating and Mold Design
Your countertop will only be as accurate as your template. Do not rush this.
- Material: The best material for templating is thin strips of 1/4-inch luan plywood or corrugated plastic, hot-glued together.
- The Process:
- Lay the strips along the front, back, and sides of your cabinets.
- Use a compass or small block of wood to scribe the exact contour of any uneven walls.
- Hot glue the strips together in place, creating a rigid, full-scale skeleton of your countertop.
- Mark the exact centerlines for your sink and faucet. Note the manufacturer’s required cutout dimensions for your sink.
- Crucially, decide on your overhang. A standard overhang is 1.5 inches past the cabinet face (not the box). Mark this clearly on your template.
- Carefully remove the template. This is now the sacred blueprint for your mold.
Part 4: The Vessel – Building a Flawless Mold
The mold is the most critical piece of carpentry in this project. It must be perfectly smooth, perfectly square, and completely waterproof.
- The Material of Choice: Melamine
Use ¾-inch melamine-coated particle board. Its factory-laminated surface is ultra-smooth and non-porous, which means the concrete won’t stick to it and will cure to a glass-like finish. - Building the Base and Walls:
- Lay your template on the melamine sheet. Remember, you are building the mold upside down. The template represents the top of the counter.
- Carefully trace the outline of your template onto the melamine.
- Cut the base of the mold to size using a track saw or a circular saw with a high-quality guide for perfectly straight cuts.
- Cut strips for the mold walls. The height of the walls determines the thickness of your countertop. For kitchen counters, 1.5 inches is the standard thickness. So, rip 1.5-inch tall strips of melamine.
- Attach the walls to the edge of the base, not on top of it. Use high-quality wood screws every 6-8 inches. Pre-drill every hole to avoid splitting the particle board.
- Ensure all corners are perfectly square.
- The Secret to Invisible Seams: Silicone Caulking
The corners and edges where the walls meet the base are your enemy. Concrete slurry will seep into these tiny cracks, creating ugly lines on your finished piece.- Run a very thin, precise bead of 100% silicone caulk along all interior seams.
- Use a caulk-tooling ball or the tip of your finger dipped in denatured alcohol to smooth the bead into a perfect, tiny radius. This tooling is what creates a beautiful, subtly rounded edge on your finished countertop.
- Let the silicone cure completely (at least 24 hours).
- Creating Knockouts for Sinks and Faucets:
- For an Undermount Sink: You need to create a void in the concrete. Center the sink’s template on the mold base. Build a box out of 1.5-inch thick rigid foam insulation, cut to the exact dimensions of the sink cutout. Use silicone to “glue” this foam box securely to the base of the mold.
- For a Drop-in Sink: You just need a hole, so the process is simpler. You can skip the knockout, as you will cut the hole later with a diamond blade grinder.
- For Faucets: Use a hole saw to cut a plug from the rigid foam. A standard faucet hole is 1 ⅜ inches. Silicone this foam plug in place.
Part 5: The Alchemist’s Brew – Choosing and Mixing Your Concrete
This is not the time for a standard bag of concrete from the big box store. That stuff is full of large, coarse aggregates and is designed for sidewalks, not fine-finished surfaces. You need a specialized countertop mix.
- Option A (Recommended): Bagged Countertop Mix
Companies like Z Counterform, SureCrete, and Buddy Rhodes have spent years perfecting all-in-one, high-performance mixes. They contain fine aggregates, plasticizers for flowability, polymers for strength, and often already include fiber reinforcement. For a first-timer, this is the most reliable path to success. Just add water and pigment. - Option B (Advanced): Mixing From Scratch
This gives you ultimate control but has a steep learning curve. A basic recipe might look like this (by volume):- 1 part Portland Cement (Type I/II)
- 2.5 parts fine, clean sand (make sure it’s washed)
- Additives:
- Water Reducer (Plasticizer): This is non-negotiable. It allows the mix to be fluid and flow into corners without adding excess water, which would kill its strength.
- Acrylic/Polymer Fortifier: Replaces some of the water. Acts as a bonding agent, increasing flexural strength and reducing shrinkage.
- Fibers: AR (Alkali Resistant) Glass Fibers are the industry standard. They provide tensile strength throughout the entire mix, helping to prevent cracks.
- Coloring Your Concrete:
You can achieve almost any color using integral pigments. These are iron oxide powders that are added to the mix. Add them to the water before mixing to ensure even distribution. Start with small test batches to dial in your color; it will dry much lighter than it appears when wet. - The Mixing Process:
- Mise en Place: Have everything ready. Mixer, buckets, water, pigments, tools.
- Dry Mix First: Thoroughly blend all your dry ingredients (cement, sand, dry pigments) to get a uniform color.
- Combine Liquids: In a separate bucket, mix your water, liquid pigments, and any liquid acrylic fortifiers.
- Combine Wet and Dry: Slowly add the dry mix to the liquids while mixing with a heavy-duty drill and paddle mixer. Do not add all the water at once! Hold some back.
- Achieve the Right Consistency: You are looking for a consistency like thick pancake batter or a runny milkshake. It should flow but not be watery. Add the remaining water slowly until you hit this mark. Mix for at least 3-5 minutes, scraping the sides and bottom of the bucket to ensure everything is incorporated.
Part 6: The Point of No Return – The Pour
This is the moment of truth. Work calmly but efficiently.
- Clean the Mold: The mold must be perfectly clean. Any speck of sawdust will be immortalized in your countertop. Wipe it down with denatured alcohol.
- Pour a Face Coat (Optional but Recommended): For the absolute best surface, mix a small, fiber-free batch of your mix and brush or spray a thin “face coat” into the mold first. This ensures the visible surface has no fibers showing.
- The Main Pour: Immediately follow the face coat with your main, fiber-reinforced mix. Pour it slowly and evenly into the mold.
- VIBRATE. VIBRATE. VIBRATE. This is the single most important step for a professional finish. Vibration consolidates the concrete, forces the slurry into every corner, and, most importantly, eliminates air bubbles (pinholes or “bug holes”).
- Methods: You don’t need a professional concrete vibrator. Strap an orbital sander (with no sandpaper) to the side of your casting table and turn it on. You can also use a reciprocating saw without a blade, pressing the metal shoe against the mold walls and base. Systematically work your way around the entire mold for at least 5-10 minutes. You will see air bubbles rising to the surface. Vibrate until they stop.
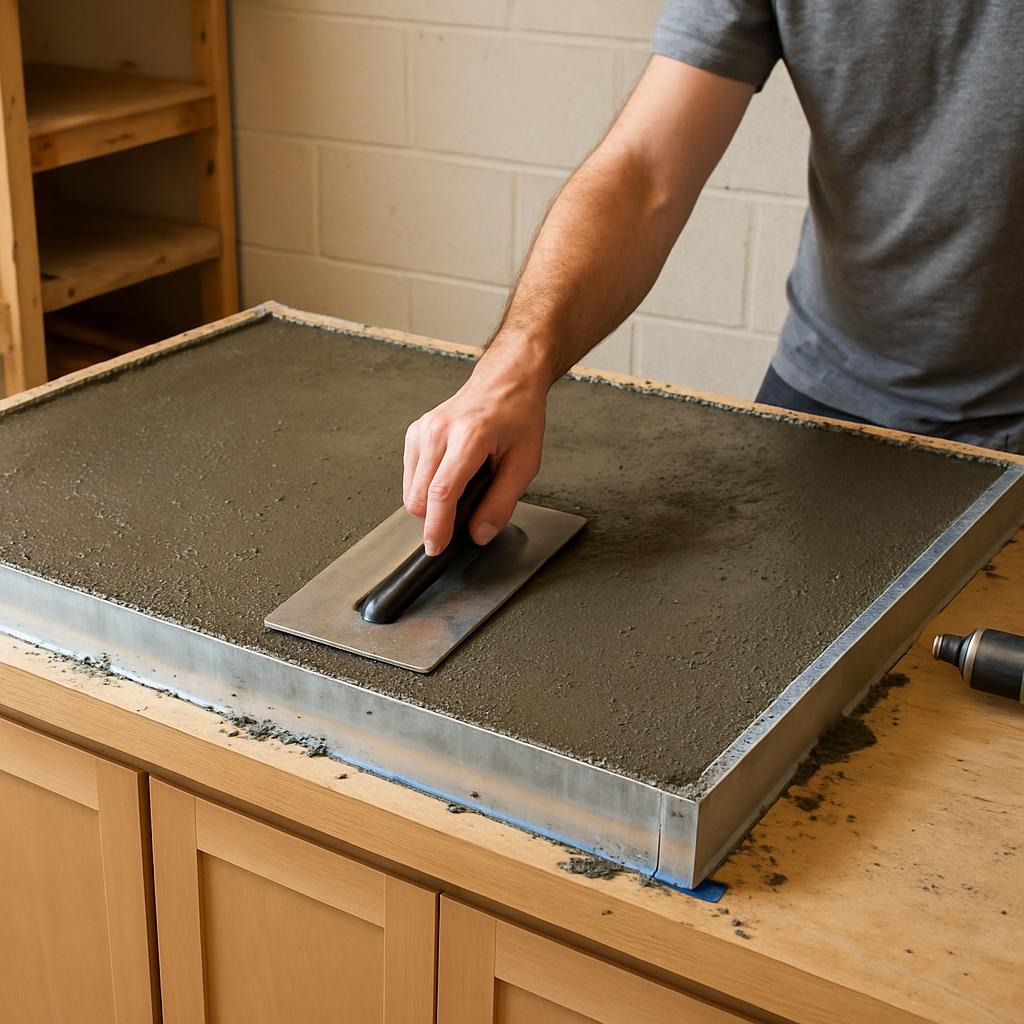
- Screed and Trowel: Once the mold is full, use a straight board to screed the top (which will be the bottom of the counter) level. As it firms up over the next few hours, give it a few passes with a magnesium or steel trowel to get a reasonably smooth finish. This side won’t be seen, but a flat bottom makes for an easier install.
Part 7: The Long Wait and The Great Reveal
Concrete doesn’t “dry,” it “cures” through a chemical reaction called hydration.
- Cover and Wait: Cover the mold with plastic sheeting to trap moisture and ensure a slow, even cure. Let it sit undisturbed for at least 48-72 hours. In a cooler climate, you might wait longer.
- De-molding: This is the best part. Carefully unscrew and gently pry away the mold walls. Be delicate. The concrete is still “green” and can chip easily.
- The Flip: This is the most nerve-wracking part. GET HELP. You need at least 3-4 strong people. Plan your moves. Lift the slab onto its edge, then carefully lower it onto foam blocks, finished-side-up. Celebrate. You’ve made a rock.
Part 8: The Transformation – Grinding and Polishing
Your countertop currently has a smooth, matte finish. The magic happens now, as you expose the fine sand aggregate and polish the surface to your desired sheen. This is a WET process. Grinding concrete dry creates a massive cloud of hazardous silica dust.
- Tools: You need a variable-speed wet polisher/grinder and a set of diamond polishing pads, typically ranging from 50 grit to 3000 grit.
- The Process:
- The First Cut (50 or 100 grit): This is the most aggressive step. It will grind off the top layer of cement paste and begin to expose the fine sand aggregate beneath. Keep the surface wet and the polisher moving in smooth, overlapping patterns.
- Fill Pinholes (The Pro Step): After the first cut, you will see small pinholes. Mix a small amount of Portland cement and polymer fortifier (no sand) into a thick “slurry.” Trowel this slurry over the entire surface, forcing it into all the pinholes. Let it cure for 24 hours.
- Continue Polishing: Come back with your 100 or 200 grit pad. This will grind off the excess slurry from the surface, leaving it only in the holes. The result is a much more solid and professional-looking surface.
- Work Through the Grits: Now, methodically work your way up through the pads: 200, 400, 800, 1500, 3000. Each successive grit erases the scratch pattern from the previous one. The surface will transform from a honed matte look (around 400 grit) to a deep, semi-gloss or high-gloss sheen (1500+ grit). Clean the surface thoroughly between grits.
Part 9: The Final Armor – Sealing Your Creation
This is a non-negotiable step. Unsealed concrete is a porous sponge. It will absorb wine, oil, and lemon juice, leaving permanent stains. You need a high-performance, food-safe sealer.
- Types of Sealers:
- Topical Sealers (Recommended): These form a protective film over the surface. Modern food-safe polyurethanes or specialized countertop sealers (like Z-SiAcryl 14) offer the best stain and acid resistance. They are available in different sheens.
- Penetrating Sealers: These soak into the concrete and seal from within. They provide a more natural look and feel but generally offer less protection against acids like lemon juice or vinegar.
- Application:
- Wait: Allow your polished countertop to fully cure and dry for at least 7-10 days before sealing.
- Clean: The surface must be surgically clean. Wipe it down with denatured alcohol.
- Apply Thin Coats: Follow the manufacturer’s instructions to the letter. Usually, this involves applying multiple very thin coats with a high-quality microfiber applicator. Do not let it puddle.
- Cure: The sealer itself needs time to cure, often for several days, before the countertop is ready for use.
Part 10: Installation and Beyond
- Installation: Run a thick bead of 100% silicone adhesive on the top edges of your cabinets. With your team, carefully lift the countertop and set it in place.
- Maintenance: Treat your concrete countertop with care. Use cutting boards. Wipe up spills promptly, especially acidic ones. Clean with pH-neutral cleaners (simple soap and water is best). Depending on the sealer and usage, you may need to re-apply a maintenance coat every few years.
Conclusion: More Than a Countertop
Look at what you have created. It is heavy. It is solid. It is uniquely yours. You have poured your time, your focus, and your strength into this piece. It has a story baked into its very matrix—the memory of the mold building, the thrill of the pour, the meditative rhythm of the polishing.
This is more than a surface. It is the stage for your life’s daily rituals. It will be there for morning coffees and late-night talks, for rolling out dough with your children and for sharing a bottle of wine with friends. It will age with you, a quiet, steadfast partner in your home. You didn’t just build a countertop; you built the heart of your kitchen. And that is an accomplishment that is truly set in stone.