How to Build a Simple Concrete Walkway or Path: A path is one of the most fundamental things we can build. It is an invitation. It is a guide. It directs our steps, creates order in a landscape, and connects one part of our world to another. In our homes, a walkway is more than just a way to get from the driveway to the front door without getting muddy shoes; it’s the first handshake your home offers a visitor. It’s the route you take to your garden sanctuary, the solid ground beneath your feet.
And to build that path yourself, with your own hands, using the elemental and enduring medium of concrete? That is a rite of passage.
Pouring a concrete walkway is one of the most achievable and profoundly satisfying large-scale projects a homeowner can tackle. It’s a perfect blend of brute force and fine art, of meticulous planning and high-stakes execution. You will become a surveyor, an excavator, a carpenter, and a sculptor all in one project.
This is not a quick-and-dirty, five-step tutorial. The internet is littered with those, and they often lead to cracked, ugly, and disappointing results. This is your comprehensive masterclass. We will journey together from the first spark of an idea to the final, critical act of curing your new liquid-stone creation. We will delve into the science of a proper sub-base, the geometry of a perfect curve, and the subtle art of the final finish.

By the time you finish this guide, you won’t just know how to pour a concrete path. You will understand how to craft a beautiful, durable, and permanent feature of your landscape—a path forged in stone that will serve your home for generations.
Let’s begin the journey.
Part 1: The Cartographer’s Phase – The Art of the Plan
The quality of your finished walkway will be a direct reflection of the quality of your planning. Haste and improvisation are the enemies of good concrete work. A full 80% of your success is determined before you ever lift a shovel. This is the intellectual phase where you become the architect of your own landscape.
Step 1: The Soul of the Path – Function and Form
Before you draw a single line, walk your property. Imagine the journey. What is the purpose of this path?
- The Formal Entrance: A walkway to the front door should be straight, direct, and welcoming. It should feel intentional and solid.
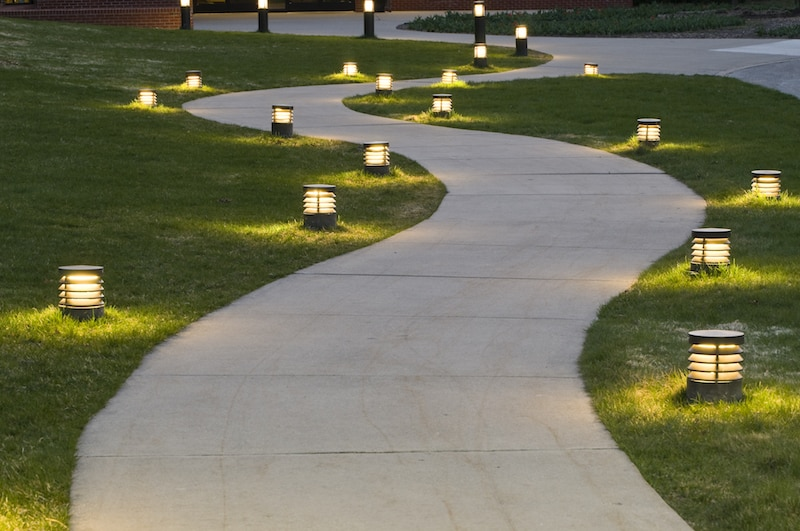
- The Meandering Garden Path: A path through a garden can be more whimsical. Gentle, sweeping curves can create a sense of discovery, revealing different parts of the garden as you walk.
- The Utilitarian Connector: A path from the back door to the garbage cans or a workshop can be purely functional, but that doesn’t mean it should be ugly. Clean lines and a good finish still matter.
Your path’s purpose will dictate its shape.
- Straight Paths: These are easier to form and excavate. They convey a sense of order, formality, and purpose.
- Curved Paths: These feel more organic and natural. They are more complex to form but can add immense character to a landscape. A good rule of thumb for curves is to make them long and sweeping. Tight, squiggly curves can look awkward and be difficult to navigate with a wheelbarrow or lawnmower.
Step 2: A Question of Scale – How Wide is Just Right?
The width of your walkway has a major psychological and practical impact.
- 36 inches (3 feet): This is the functional minimum for a comfortable one-person walkway. Anything less can feel cramped.
- 48 inches (4 feet): This is a more generous and welcoming width, allowing two people to walk side-by-side (though it’s a bit snug). This is an excellent width for a main path to a front entrance.
- 60 inches (5 feet): This is the luxury standard, comfortably accommodating two people and creating a grander sense of arrival.
Pro-Tip: Test it out! Lay down two garden hoses to represent the edges of your proposed path. Walk on it. Have a family member walk with you. Does it feel right? Adjust until the scale feels perfect for your space.
Step 3: The Unseen Enemy – Conquering Water
Water is the arch-nemesis of all outdoor construction. If it pools on or around your walkway, it will lead to staining, moss growth, and, in cold climates, cracking and heaving from freeze-thaw cycles. Your plan must include drainage.
- The Golden Rule: Slope. Your walkway must have a gentle slope to shed water. The standard is a ¼ inch of fall for every 1 foot of run (a 2% grade).
- Side-to-Side Slope: This is the most common method. The path is built to be very slightly tilted to one side, encouraging water to run off into a lawn or garden bed.
- End-to-End Slope: If your path is on a naturally sloped piece of land, you can use that to your advantage, directing water down the length of the path.
- Crucially, never slope the path towards your house’s foundation. Always direct water away from structures.
Step 4: The Most Important Phone Call You’ll Make
Before you stab a shovel into the ground, stop. Underground, your property is a web of vital infrastructure. There can be buried gas lines, water pipes, electrical conduits, and communication cables. Hitting one of these can be incredibly dangerous, expensive, and even fatal.
- In the United States, call 811 (Call Before You Dig).
- In other countries, search for your local utility locating service.
This is a free service. They will come to your property and mark the locations of all public utilities with flags or spray paint. Plan your path to avoid these areas completely. This is not optional; it is essential.
Part 2: The Groundbreaker’s Work – From Sod to Solid Base
With a solid plan in hand, the physical labor begins. The strength and longevity of your concrete are entirely dependent on the quality of the foundation you build for it.
Step 1: Layout – From a Sketch to the Real World
You’ll need wooden stakes, a hammer, a tape measure, and plenty of mason’s string.
- Stake and String: Drive stakes into the ground to mark the corners and edges of your path. Run taut string lines between them to create a clear visual guide for your excavation.
- For Curves: Use a garden hose to lay out your desired curve. Once you are happy with the shape, use landscaping spray paint to mark the line on the grass, then place stakes every few feet along the curve.
- Squaring Corners (for adjoining paths): Use the classic 3-4-5 triangle method to ensure any corners are a perfect 90 degrees. Measure 3 feet along one side and 4 feet along the other; the diagonal between those two points should be exactly 5 feet.
Step 2: Excavation – The Big Dig
This is the most strenuous part of the job. For a long path, consider renting a sod cutter.
- Depth Calculation: Your total excavation depth = Concrete Thickness + Sub-base Thickness.
- Concrete Thickness: For a standard walkway, 4 inches is the required thickness.
- Sub-base Thickness: A 4-inch layer of compacted gravel is essential.
- Total Depth = 4 inches (concrete) + 4 inches (gravel) = 8 inches. You need to dig down 8 inches from your final desired surface height.
- Remove All Topsoil: The dark, rich topsoil is full of organic matter. This material will decompose over time, creating voids under your slab that will lead to settling and cracking. You must dig down to the stable, lighter-colored subsoil.
Step 3: The Unsung Hero – The Compacted Gravel Sub-base
DO NOT SKIP THIS STEP. Pouring concrete directly on dirt is the number one cause of failed DIY walkways. A properly installed sub-base of compacted gravel is critical for three reasons:
- It provides a stable, uniform foundation that won’t shift or settle.
- It allows for excellent drainage, giving water a place to go so it doesn’t sit under your slab.
- It acts as a “capillary break,” preventing ground moisture from wicking up into the concrete from below.
- Material: Use a ¾-inch crushed aggregate. This may be called “Class 5,” “road base,” “crusher run,” or “Type 101.” It’s a mix of crushed stone and fines that lock together beautifully when compacted.
- Placement: Add the gravel in 2-inch “lifts” (layers).
- Compaction is Mandatory: For any serious walkway, you must rent a plate compactor. A hand tamper is simply not sufficient to achieve the necessary density. Run the compactor over the entire area until the gravel is locked down solid. A properly compacted base should be so firm you can walk on it without leaving deep footprints.
Part 3: The Carpenter’s Craft – Building the Forms
The forms are the wooden mold that will hold the wet concrete and define the final shape and height of your path. They must be straight, strong, and precisely placed.
- Material: For a 4-inch thick slab, standard 2×4 lumber is perfect. Use the straightest boards you can find. You will also need plenty of 12- to 18-inch wooden or steel stakes.
For Straight Paths:
- Cut your 2x4s to length.
- Place them inside your excavated trench, along your string lines.
- Drive stakes every 2-3 feet along the outside of the 2x4s.
- Use screws to fasten the stakes securely to the forms. This bracing is what will resist the immense outward pressure of the wet concrete.
For Curved Paths (The Artisan’s Technique):
You can’t bend a 2×4 into a smooth curve. You need a flexible form material.
- The Best Material: ¼-inch hardboard (Masonite), cut into 3.5-inch wide strips.
- The Technique:
- Drive stakes every 1.5 to 2 feet along the inside of your desired curve.
- Use two or three layers of the hardboard strips. Bend them against the inside of the stakes.
- Screw through the hardboard into the stakes to hold the curve. The multiple layers provide the necessary strength.
- Alternative: You can also use a 2×4 and make a series of cuts (kerfs) two-thirds of the way through the board every inch or so. This will allow the board to bend into a gentle curve.
Setting the Final Grade:
This is a precision job. The top edge of your forms is the final surface of your walkway.
- Tie new, tight string lines to your stakes to represent the finished height.
- Use a string level, a 4-foot level, or a laser level to set the slope you planned for earlier (e.g., ¼ inch drop per foot).
- Tap the forms up or down until the top edge perfectly matches the height and slope of your string line. Double-check and triple-check everything.
Pro-Tip: Coat the inside face of your forms with a form release agent, or simply wipe them down with used motor oil on a rag. This will prevent the concrete from sticking and make removal much easier.
Part 4: The Alchemist’s Decision – Concrete and Reinforcement
The Big Choice: Bagged Mix vs. Ready-Mix Truck
- Bagged Mix (e.g., Quikrete):
- Pros: Ideal for very short paths or single landing pads. You can work at your own pace.
- Cons: For any path of significant length, it becomes a monumental, back-breaking task. It’s difficult to get a consistent mix from batch to batch, and it’s more expensive per cubic yard.
- Ready-Mix Delivery:
- Pros: High-quality, perfectly consistent concrete delivered to your site. Saves an incredible amount of labor. More cost-effective for larger jobs.
- Cons: You are on the clock. Once the truck arrives, you have a limited time to place and finish the concrete. Requires good access for a very heavy truck.
Calculating Your Needs:
- Volume = Length x Width x Depth. (Use feet for all units. 4 inches = 0.333 feet).
- Example: A path 20 ft long x 3 ft wide x 4 in thick: 20 x 3 x 0.333 = 19.98 cubic feet.
- For Ready-Mix (convert to cubic yards): 19.98 ÷ 27 = 0.74 cubic yards.
- ALWAYS add a 10% buffer. 0.74 x 1.10 = 0.81 cubic yards. You would order 1 cubic yard.
- For Bagged Mix (check yield on bag): If a 60lb bag yields 0.45 cubic feet: 19.98 x 1.10 = 21.98 cubic feet needed. 21.98 ÷ 0.45 = ~49 bags.
The Verdict: If your calculation calls for more than about 30-40 bags, seriously consider ordering from a ready-mix company. Your back will thank you.
Reinforcement: The Steel Skeleton
Concrete has immense compressive strength (resisting squeezing) but poor tensile strength (resisting pulling apart). Steel reinforcement provides this tensile strength, holding the slab together and minimizing cracking from soil movement or thermal expansion.
- Welded Wire Mesh: A grid of steel wire that comes in rolls or sheets. It’s good for light-duty applications.
- Rebar (#3 or ⅜-inch): Steel reinforcing bars provide superior strength and are recommended. Lay them in a grid pattern about 18-24 inches on center.
- CRITICAL PLACEMENT: Reinforcement does absolutely no good lying on the gravel base. It must be positioned in the middle of the slab’s thickness. Use small plastic or concrete supports called “chairs” or “dobies” to hold the reinforcement up off the gravel base before you pour.
Part 5: The Main Event – Pour Day Choreography
This is the day when all your preparation pays off. It’s a fast-paced, coordinated effort.
- Your Crew: This is not a solo job. You need at least one helper, preferably two.
- Your Tools (Ready to Go): Wheelbarrow, square-headed shovels, concrete rake (come-along), a very straight 2×4 for a screed board, a bull float, a magnesium hand float, an edger, a groover (jointer), rubber boots, gloves, and safety glasses.
- Final Prep: Lightly dampen the gravel sub-base and the inside of the forms with a hose. This prevents them from sucking water out of the concrete mix too quickly.
- The Pour: Start at the end farthest from your concrete source (the truck or your mixer). Place the concrete into the forms, don’t just dump it in giant piles.
- Spread: Use the rake and shovels to spread the concrete evenly, overfilling the forms slightly. Make sure to work the concrete under your reinforcement grid.
- Screeding: This is the first and most important leveling step. Lay your straight screed board across the top of your forms. Use a back-and-forth sawing motion as you and your helper pull it towards you. This shaves off the excess and leaves a flat surface. Fill any low spots behind the screed and make a second pass.
- Bull Floating: Immediately after screeding, while the concrete is still very wet, use the bull float. Its large, flat head smooths the ridges left by the screed, pushes the large aggregate down slightly, and starts to bring the rich cement paste (“cream”) to the surface. Push the float across the slab with the leading edge tilted up, then pull it back with the opposite edge tilted up.
Part 6: The Artisan’s Touch – Finishing the Surface
After bull floating comes the most critical part: waiting. The concrete needs to firm up. You’ll see a layer of water, called “bleed water,” rise to the surface. You cannot do any finishing until this water has completely evaporated and the surface has lost its wet sheen.
The Thumbprint Test: The concrete is ready for finishing when you can press your thumb on it and leave only a slight indentation, about ¼-inch deep.
- Edging: Run an edger tool along the inside perimeter of the forms. This compacts the edge and gives it a clean, rounded profile that resists chipping.
- Control Joints: Concrete shrinks as it cures, which causes cracking. Control joints are grooves that create a weakened plane, encouraging the concrete to crack in a straight, hidden line where you want it to.
- Spacing: Joints should be spaced (in feet) no more than 2 to 3 times the slab’s thickness (in inches). For a 4-inch slab, place joints every 8 to 12 feet.
- Depth: The joint must be at least ¼ of the slab’s thickness. For a 4-inch slab, the groove must be 1 inch deep.
- Technique: Lay a straight board across the path as a guide and run your groover tool along it to create a clean, straight joint.
- The Final Texture: The Broom Finish. For a walkway, a non-slip surface is essential. A broom finish is the classic, professional choice.
- Timing: This is the very last step.
- Technique: After all edging and jointing is done, gently drag a special concrete broom (or a clean, stiff push broom) across the surface. Pull the broom in one continuous motion from one edge to the other. Lift it and place it for the next pass, slightly overlapping the last one. The entire path should have a consistent, uniform texture.
Part 7: The Guardian’s Vigil – The Sacred Act of Curing
You are not done yet. This is the final, crucial step that many amateurs neglect. Concrete does not “dry”; it cures through a chemical reaction called hydration. This reaction needs water to form the interlocking crystals that give concrete its strength. If the surface dries out too quickly, the reaction stops, and you’re left with a weak, dusty, crack-prone surface.
You must keep your new walkway continuously moist for at least 7 days.
- Misting: The simplest method. Gently spray the surface with a fine mist of water several times a day.
- Covering (Best Method): After the concrete is hard enough to not be marred (usually the next day), cover the entire path with 6-mil plastic sheeting. Overlap the seams and weigh down the edges with rocks or lumber to trap the moisture.
- Curing Compounds: You can buy a spray-on chemical curing compound that forms a film to lock in moisture.
Part 8: The Finishing Line
- Removing Forms: After the 7-day curing period, you can remove your forms. Carefully pry away the stakes and boards.
- Backfilling: Fill the gap along the sides of your new path with topsoil. You can then plant grass seed or lay sod right up to the edge for a clean, professional look.
- Wait: While you can walk on the path after a few days, it takes about 28 days for concrete to reach its full design strength.
Conclusion: The Path of Permanence
Stand at the beginning of your new walkway. Look at the clean lines, the uniform finish, the solid, unyielding presence it now has in your landscape. You did not just pour a slab of concrete. You forged a path. You took dirt, gravel, powder, and water, and through meticulous planning and hard work, you created something of lasting value and utility.
Every step you take on it will be a quiet reminder of your accomplishment. It is a testament to your skill, your patience, and your ability to create something truly permanent. You have not only improved your home; you have mastered a fundamental craft and left a lasting mark on your own corner of the world. Now, enjoy the journey.