How to Clean and Remove Stains from Your Concrete Driveway: Your driveway is more than just a place to park your car; it’s the welcome mat to your home, a significant component of your property’s curb appeal, and often, a playground for your kids or a workspace for your projects. Over time, this hardworking slab of concrete inevitably falls victim to a barrage of assaults. Leaky cars leave behind ugly oil and grease spots, fallen leaves create organic tannic acid stains, and moisture can lead to the growth of unsightly mold and mildew. What was once a clean, pristine surface can quickly become a patchwork of discoloration that detracts from the beauty of your home.
Many homeowners resign themselves to a stained driveway, believing the marks are permanent. The good news is that with the right knowledge, techniques, and a little bit of elbow grease, you can restore your concrete driveway to its former glory. This comprehensive guide will walk you through everything you need to know, from routine cleaning and pressure washing to tackling the most stubborn and specific types of stains. We’ll explore both commercial products and effective DIY solutions, ensuring you have the information you need to get the job done right, regardless of your budget.
The Foundation of a Clean Driveway: General Cleaning and Preparation
Before you can zero in on specific stains, it’s essential to give your entire driveway a thorough cleaning. This initial step will wash away surface dirt, grime, and debris, revealing the true extent of any underlying stains and preparing the concrete for more targeted treatments.
Step 1: Clear the Area
Begin by removing everything from your driveway: cars, bicycles, garbage cans, potted plants, and any other items. This will give you a clear, unobstructed space to work.
Step 2: A Thorough Sweep
Using a stiff-bristled push broom, give the entire driveway a vigorous sweep. Your goal is to remove all loose debris, including dirt, leaves, twigs, and pebbles. For particularly dusty driveways, you might consider wearing a dust mask. Pay special attention to the edges and corners where debris tends to accumulate. Using a leaf blower can speed up this process significantly.
Step 3: Degreasing the Entire Surface (Optional but Recommended)
Even if you don’t have prominent oil stains, your driveway likely has a light layer of grime from vehicle traffic and environmental pollutants. Applying a concrete degreaser can make a world of difference.
- How to Use a Concrete Degreaser: Most concrete degreasers are alkaline-based soaps that emulsify oil and grime, making them easier to wash away. They are typically available in concentrated form.
- Dilute the degreaser in a bucket of water according to the manufacturer’s instructions.
- Pour the solution generously over a section of the driveway.
- Using your stiff-bristled push broom, scrub the solution into the concrete. Work in manageable sections, ensuring the entire surface is treated.
- Let the degreaser sit for 10-15 minutes, but don’t allow it to dry on the surface. If it starts to dry, lightly mist the area with water.
Step 4: The Power of Pressure Washing
A pressure washer (or power washer) is the single most effective tool for deep cleaning a concrete driveway. It uses a high-pressure stream of water to blast away embedded dirt and grime that a simple garden hose and scrub brush can’t touch.
Choosing the Right Pressure Washer and Nozzle:
- PSI (Pounds per Square Inch): For concrete, a pressure washer with a rating of at least 3000 PSI is recommended.
- GPM (Gallons Per Minute): A higher GPM (around 4) will clean faster.
- Nozzles: Pressure washers come with interchangeable nozzles, indicated by color or degree.
- White (40-degree): A wide spray, good for general cleaning and rinsing.
- Green (25-degree): A narrower, more powerful spray, effective for stubborn dirt.
- Yellow (15-degree): A very focused, powerful stream. Use with caution as it can etch softer concrete.
- Red (0-degree): An extremely powerful, pinpoint stream. Avoid using the red nozzle on concrete, as it can easily cause damage.
How to Safely and Effectively Pressure Wash Your Driveway:
- Safety First: Wear safety glasses to protect your eyes from flying debris, closed-toe shoes, and be mindful of where you are pointing the wand. The high-pressure stream can cause serious injury.
- Protect Your Surroundings: Before you start, cover nearby plants, doors, windows, and siding with plastic sheeting to protect them from the high-pressure spray and dislodged grime.
- Start with a Wider Nozzle: Begin with the white (40-degree) or green (25-degree) nozzle. You can always switch to a more powerful nozzle if needed, but it’s best to start gently.
- Maintain a Consistent Distance and Motion: Hold the tip of the wand about 12 inches from the concrete surface. Work in a sweeping motion, moving back and forth in slightly overlapping lines. This will prevent streaking and ensure an even clean.
- Work in Sections: Divide your driveway into manageable sections and clean one at a time, working from the highest point of the driveway downwards to allow the dirty water to drain away.
- Rinse Thoroughly: Once you have cleaned the entire driveway, rinse it down with the pressure washer (using a wider nozzle) or a garden hose to wash away all the loosened dirt and cleaning solution.
After this general cleaning, your driveway will look significantly better. Now, you can turn your attention to any stubborn stains that remain.
The Stain-Buster’s Playbook: How to Remove Specific Concrete Stains
Different types of stains require different removal methods. Here’s a breakdown of how to tackle the most common culprits.
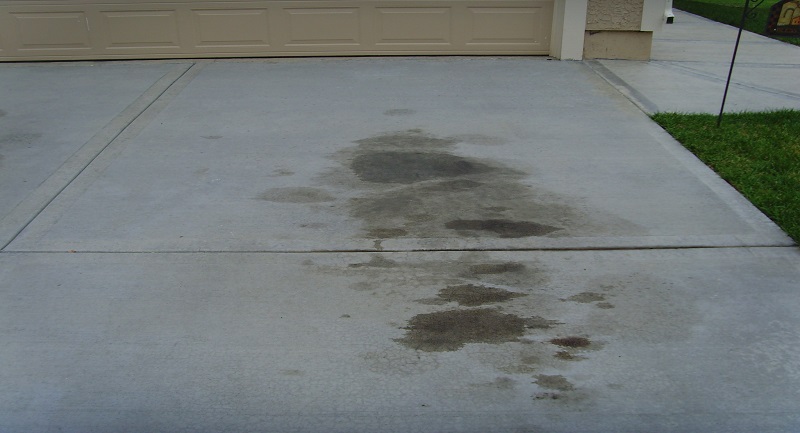
1. Oil, Grease, and Transmission Fluid Stains
These are perhaps the most common and unsightly driveway stains. The key to successful removal is to act as quickly as possible, as oil will continue to seep deeper into the porous concrete over time.
Method 1: The Kitty Litter Poultice (For Fresh Spills)
This method is highly effective for absorbing fresh oil spills before they have a chance to set.
You Will Need:
- Clay-based kitty litter (avoid the clumping or crystal varieties)
- A stiff-bristled brush
- A dustpan
Steps:
- Do Not Wipe: Wiping a fresh oil spill will only spread it and push it deeper into the concrete.
- Cover the Spill: Generously pour the kitty litter over the entire spill, creating a thick layer.
- Grind it In: Put on a sturdy pair of shoes and grind the kitty litter into the oil stain with your feet. This breaks up the litter and helps it absorb the maximum amount of oil.
- Let it Sit: Allow the kitty litter to sit on the stain for at least several hours, or ideally, overnight.
- Sweep it Up: Sweep up the oil-soaked kitty litter and dispose of it properly.
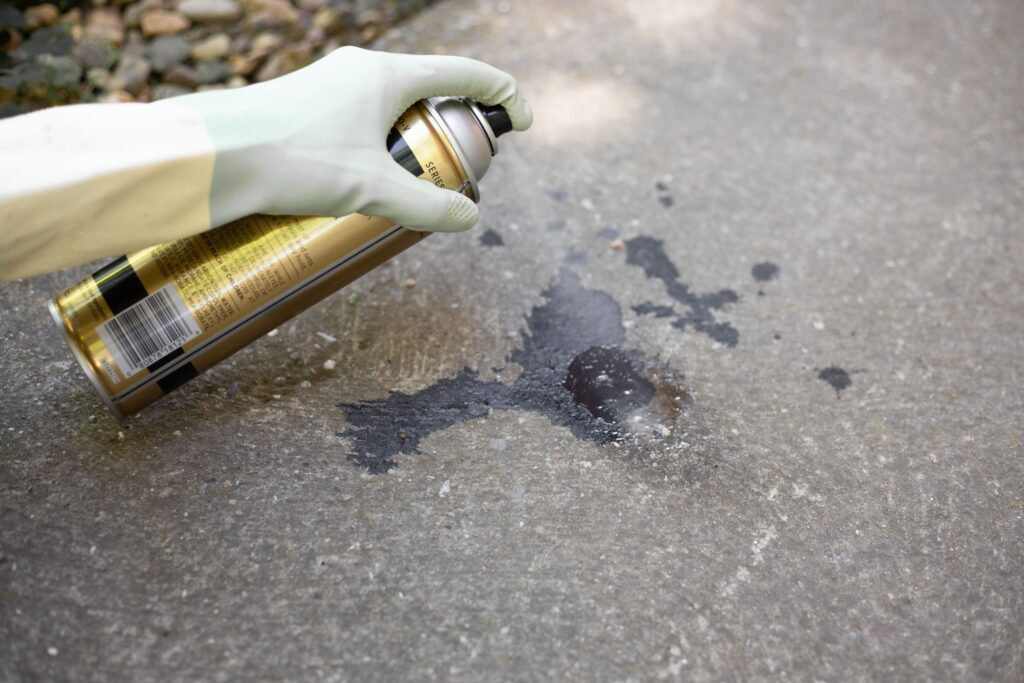
Method 2: Commercial Concrete Degreasers (For Older, Set-in Stains)
For stains that have already set, a powerful commercial degreaser is your best bet.
You Will Need:
- A high-quality concrete degreaser
- A stiff nylon brush (a wire brush can be too abrasive)
- Water
- Safety gear (gloves, glasses)
Steps:
- Apply the Degreaser: Pour the degreaser directly onto the oil stain.
- Scrub Vigorously: Use a stiff nylon brush to scrub the degreaser into the stain. You should see the oil start to lift and emulsify.
- Let it Penetrate: Allow the degreaser to sit on the stain for 15-30 minutes, but do not let it dry.
- Scrub Again and Rinse: Scrub the area one more time, and then rinse thoroughly with a strong stream of water from a garden hose or your pressure washer.
- Repeat if Necessary: For deep, stubborn stains, you may need to repeat this process two or three times.
DIY Alternative: A paste made of baking soda and water can be effective for smaller, lighter oil stains. Apply the paste, let it sit, scrub, and rinse.
2. Rust Stains
Rust stains can be caused by metal furniture, tools, planters with metal bases, or even the iron content in some fertilizers. These orange-brown stains can be particularly stubborn.
Method 1: Lemon Juice or White Vinegar (For Light Stains)
The mild acid in lemon juice and white vinegar can effectively dissolve light rust stains.
You Will Need:
- Lemon juice (fresh or bottled) or white vinegar
- A stiff brush
Steps:
- Apply the Acid: Pour the lemon juice or white vinegar directly onto the rust stain.
- Let it Sit: Allow the acid to sit and work on the stain for about 10-15 minutes.
- Scrub and Rinse: Scrub the area with a stiff brush and then rinse thoroughly with water.
Method 2: Commercial Rust Removers (For Stubborn Stains)
For more severe rust stains, a commercial rust remover containing oxalic acid is the most effective solution.
You Will Need:
- A commercial rust remover (read the label to ensure it’s safe for concrete)
- A brush
- Water
- Safety gear (these are strong chemicals)
Steps:
- Follow the Instructions: Always follow the manufacturer’s instructions carefully. This will typically involve applying the product to the stain, letting it sit for a specific amount of time, scrubbing, and then rinsing.
- Neutralize if Required: Some strong acid-based cleaners may require a neutralizing agent, such as a solution of baking soda and water, to be applied after rinsing. Check the product label.
3. Tire Marks
Black tire marks are a common sight on driveways, especially where tires repeatedly turn. These marks are actually plasticizer residue from the tire that leaches out and bonds with the concrete sealer or the concrete itself.
Method 1: Concentrated Degreaser and Pressure
A high-quality concrete degreaser is often the most effective way to remove tire marks.
You Will Need:
- A concentrated concrete cleaner or degreaser
- A stiff brush
- A pressure washer
Steps:
- Wet the Area: Lightly wet the tire marks with water.
- Apply the Cleaner: Apply the concentrated cleaner directly to the marks.
- Scrub: Use a stiff brush to agitate the cleaner and loosen the tire marks.
- Pressure Wash: Use your pressure washer (with a 25-degree nozzle) to blast away the marks. Hold the wand at a slight angle to the surface for the best results.
4. Paint Stains
Whether it’s from a DIY project gone wrong or splatters from painting your house, paint stains can be tricky. The removal method will depend on whether the paint is latex-based (water-based) or oil-based.
For Latex Paint:
- If the paint is still wet, simply scrub it with soap and water and rinse.
- If the paint is dry, you can often soften it with a paint stripper specifically designed for latex paint, or by using a product like “Goof Off” or “Goo Gone.” Apply the product, let it sit, and then scrub or scrape the paint off. A pressure washer can also be effective at removing flaking latex paint.
For Oil-Based Paint:
Oil-based paint is more difficult to remove.
You Will Need:
- A chemical paint stripper formulated for oil-based paints
- A scraper or putty knife
- A stiff brush
- Safety gear (paint strippers are harsh chemicals)
Steps:
- Apply the Stripper: Apply the paint stripper to the stain according to the manufacturer’s directions.
- Let it Work: Allow the stripper to sit and soften the paint. You will see it start to bubble and lift.
- Scrape and Scrub: Use a scraper to remove the softened paint, and then scrub the area with a stiff brush and water to remove any residue.
- Rinse: Rinse the area thoroughly. You may need to repeat the process for thick layers of paint.
5. Mold, Mildew, and Algae Stains
In shady, damp areas of your driveway, you may notice green or black stains, which are typically mold, mildew, or algae. These not only look bad but can also make the surface slippery and hazardous.
Method 1: Bleach and Water Solution
A simple solution of household bleach and water is very effective at killing mold and mildew.
You Will Need:
- Household bleach
- Water
- A garden sprayer or bucket
- A stiff brush
Steps:
- Create the Solution: Mix equal parts bleach and water in a garden sprayer or bucket.
- Protect Your Plants: Thoroughly water any nearby plants and grass before and after applying the bleach solution. This will dilute any runoff and prevent the bleach from damaging them.
- Apply the Solution: Spray or pour the bleach solution onto the stained areas.
- Let it Sit: Allow the solution to sit for 15-20 minutes. You should see the stains begin to lighten.
- Scrub and Rinse: Scrub the area with a stiff brush and then rinse the entire driveway thoroughly with water.
Method 2: Commercial Mold and Mildew Removers
There are also many commercial products specifically designed to kill mold and mildew on concrete. These are often oxygen-based cleaners and can be a good alternative if you prefer not to use bleach.
6. Organic Stains (Leaves, Berries, etc.)
Fallen leaves, berries, and acorns can leave behind brown, tannin-based stains, especially if they are left to sit on a damp driveway.
Method 1: General Cleaning and Sunlight
Often, a thorough cleaning with a concrete degreaser and a pressure washer will significantly lighten or remove these stains. Any remaining discoloration will often fade over time with exposure to sunlight.
Method 2: Oxygen Bleach
For more stubborn organic stains, a product containing oxygen bleach (like OxiClean) can be effective.
You Will Need:
- Powdered oxygen bleach
- Warm water
- A brush
Steps:
- Make a Paste: Mix the powdered oxygen bleach with a small amount of warm water to create a paste.
- Apply the Paste: Apply the paste to the stain and let it sit for about 30 minutes.
- Scrub and Rinse: Scrub the area with a brush and then rinse thoroughly.
Prevention: The Best Way to Keep Your Driveway Clean
Once you’ve put in the effort to clean your driveway, you’ll want to keep it that way for as long as possible. Preventative maintenance is key.
Seal Your Concrete
Applying a quality concrete sealer is the single most important step you can take to protect your driveway. A sealer creates a protective barrier on the surface of the concrete, preventing oil, water, and other substances from penetrating the pores. This makes cleaning much easier and helps to prevent stains from setting in the first place.
- Penetrating Sealers (Silane/Siloxane): These are a great choice for driveways as they provide excellent protection against moisture and de-icing salts without making the surface slippery or changing its appearance.
- Film-Forming Sealers (Acrylic): These can give your driveway a “wet look” or a gloss finish, enhancing its appearance while also providing protection.
A sealer should typically be reapplied every 2-5 years, depending on the product and the amount of traffic your driveway receives.
Address Spills Immediately
The sooner you can clean up a spill, the less likely it is to cause a permanent stain. Keep a bag of kitty litter or other absorbent material handy in your garage for quick and easy cleanup of oil and fluid leaks.
Regular Sweeping
Don’t let leaves and other organic debris sit on your driveway for long periods, especially during wet weather. A quick sweep once a week can prevent many organic stains from forming.
A Final Word on a Flawless Driveway
A clean, stain-free driveway is an achievable goal for any homeowner. By starting with a thorough general cleaning, correctly identifying and treating specific stains, and committing to preventative maintenance like regular sealing, you can dramatically improve your home’s curb appeal and protect your investment for years to come. So, roll up your sleeves, gather your supplies, and get ready to reclaim the clean, welcoming entrance your home deserves.