Mastering the Concrete Finish: Concrete is a ubiquitous and durable material, forming the foundation of countless structures, from towering skyscrapers to humble garden paths. But the true mastery of this versatile material lies not just in its structural integrity, but in the final finish. A well-executed concrete finish can elevate a purely functional surface into a design element, adding beauty, texture, and value to any project. This comprehensive guide will delve into the art and science of mastering the concrete finish, exploring everything from the fundamental techniques to advanced decorative applications. Whether you’re a seasoned professional or an ambitious DIY enthusiast, this in-depth exploration will equip you with the knowledge to achieve flawless, professional-grade concrete surfaces.
The Unseen Science: What Makes a Great Concrete Finish?
Before we dive into the hands-on techniques, it’s crucial to understand the science that underpins a successful concrete finish. The quality of your finish is directly influenced by the concrete mix itself, the environmental conditions, and the critical process of curing.
The Perfect Pour: Concrete Mix Design
The journey to a perfect finish begins with the concrete mix. The right proportions of cement, water, aggregates (sand and gravel), and any admixtures will determine the workability, strength, and ultimate appearance of your concrete. A high-quality mix is essential for both longevity and a superior finish.
- Water-Cement Ratio: This is arguably the most critical factor. A lower water-to-cement ratio results in stronger, more durable concrete, but it can be stiffer and more challenging to finish. Conversely, a higher water content makes the concrete more workable but can lead to a weaker surface prone to cracking and dusting.
- Aggregates: The size, shape, and gradation of the aggregates impact the texture and workability of the mix. Well-graded aggregates, with a good distribution of sizes, create a denser, more stable mix.
- Admixtures: These are chemicals added to the concrete to modify its properties. Water-reducing admixtures can improve workability without adding excess water, while air-entraining admixtures create microscopic air bubbles that enhance the concrete’s resistance to freeze-thaw cycles.
The Curing Clock: A Race Against Time
Curing is the process of maintaining adequate moisture and temperature in the concrete for a period of time so that it can achieve its desired strength and durability. This is a critical and often overlooked step in the finishing process. Improper curing can lead to a host of problems, including a weak surface, cracking, and a shortened lifespan.
Effective curing methods include:
- Water Curing: This involves keeping the concrete surface continuously wet by ponding, spraying, or covering it with wet burlap.
- Sealing: Applying a curing compound to the surface traps moisture within the concrete.
- Covering: Using plastic sheeting to prevent moisture from evaporating.
The curing process should begin as soon as the final finish is complete and continue for at least a week.
The Essential Toolkit: Your Arsenal for a Flawless Finish
Having the right tools is non-negotiable for achieving a professional concrete finish. Each tool has a specific purpose and plays a vital role in the finishing sequence. Here’s a rundown of the essential equipment:
- Screed or Straight Board: Used to strike off excess concrete and bring the surface to the desired level.
- Bull Float or Darby: These tools are used to level ridges, fill voids, and embed coarse aggregate just below the surface, bringing a layer of mortar to the top for a smoother finish.
- Edging Tool: Creates a neat, rounded edge along the perimeter of the slab, which helps to prevent chipping.
- Groover or Jointer: Used to create control joints in the slab to prevent random cracking.
- Magnesium or Wooden Hand Float: Used for further smoothing and compacting the surface.
- Steel Trowel or Fresno: Utilized to create a hard, dense, and smooth final finish.
The Finishing Symphony: A Step-by-Step Guide
Concrete finishing is a multi-stage process where timing is everything. Each step must be performed at the right moment in the concrete’s setting process to achieve the desired outcome.
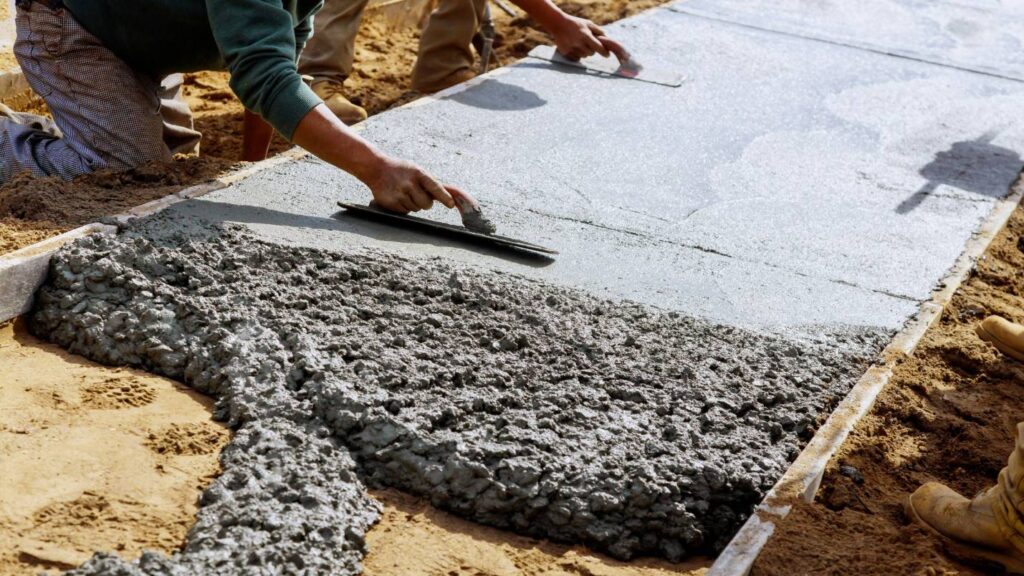
Step 1: Pouring and Spreading
The process begins with pouring the concrete into the prepared forms. It’s important to place the concrete as close to its final position as possible to avoid excessive handling, which can cause segregation of the aggregates. Use a square shovel or a come-along to spread the concrete evenly.
Step 2: Screeding – The Initial Leveling
Immediately after pouring, the concrete needs to be leveled. This is done using a screed board, which is a straight 2×4 or a metal straightedge. The screed is moved in a sawing motion across the top of the forms to strike off the excess concrete and create a flat surface.
Step 3: Floating – Smoothing the Surface
After screeding, the surface will still be rough. The next step is floating, which is done with a bull float for large areas or a darby for smaller slabs. The float is swept across the surface in wide, overlapping arcs to level out any remaining high or low spots and to embed the coarse aggregate. This process brings a layer of “cream” or mortar to the surface, which is essential for the subsequent finishing steps. This should be completed before excess “bleed water” appears on the surface.
Step 4: The Waiting Game – Letting the Bleed Water Evaporate
After floating, you’ll notice a sheen of water appearing on the surface. This is called “bleed water,” and it’s crucial to let it completely evaporate before proceeding. Finishing the concrete while bleed water is present can lead to a weak, porous surface. The time it takes for the bleed water to disappear will vary depending on the weather conditions.
Step 5: Edging and Grooving – Defining the Details
Once the bleed water has evaporated and the concrete has started to stiffen, it’s time for edging and grooving. An edging tool is used to create a clean, rounded edge along the forms. This not only improves the appearance but also helps to prevent the edges from chipping. Groovers are then used to cut control joints into the slab. These joints create weakened planes that encourage the concrete to crack in a straight line, rather than in a random, unsightly pattern.
Step 6: The Final Touches – Troweling for a Smooth Finish
Troweling is the final step in creating a smooth, dense surface. This is typically done with a steel trowel. The first troweling pass is done with the trowel held almost flat to the surface, using long, sweeping arcs. For an even smoother finish, a second and even third pass can be done, with the trowel angled slightly more with each pass. It’s important to note that troweling is generally only done for indoor concrete, as a very smooth surface can be slippery when wet.
A World of Finishes: Exploring Different Textures and Styles
Beyond the basic smooth finish, there’s a wide array of decorative and functional finishes to choose from. The choice of finish will depend on the intended use of the concrete, as well as the desired aesthetic.
Broom Finish: Simple and Slip-Resistant
One of the most common and practical finishes, especially for outdoor surfaces, is the broom finish. After the concrete has been floated and troweled (or just floated), a broom is gently dragged across the surface to create fine lines. This provides a non-slip texture that is ideal for driveways, sidewalks, and patios. The timing of the broom finish is crucial; the concrete should be firm enough to hold the broom marks without them closing back up.
Stamped Concrete: The Art of Imitation
Stamped concrete offers the durability and affordability of concrete with the look of more expensive materials like stone, brick, or even wood. This is achieved by pressing flexible polyurethane stamps into the surface of the freshly poured concrete. A wide variety of patterns and textures are available, allowing for endless design possibilities. Color can also be added to the concrete to further enhance the realistic appearance.
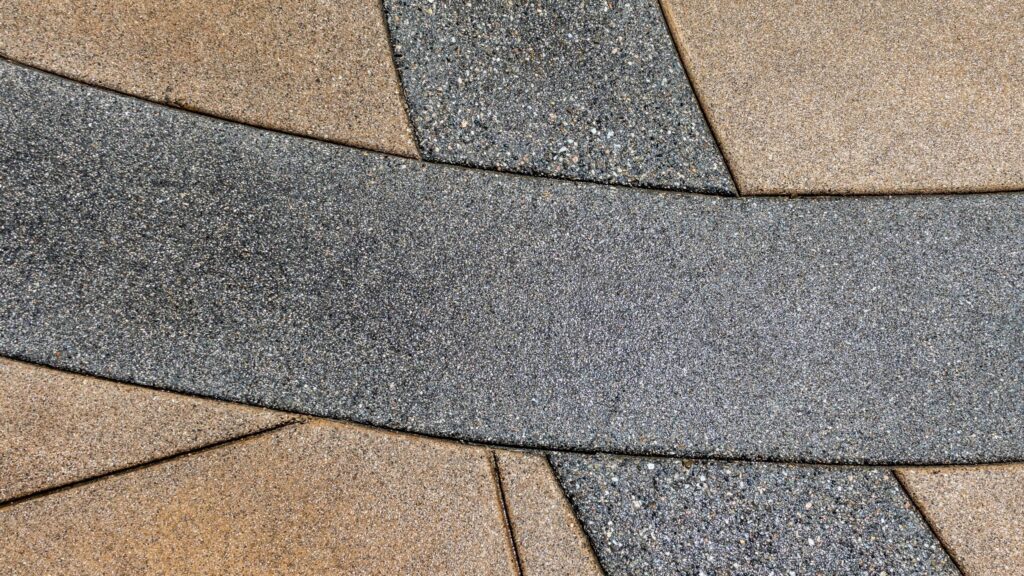
Exposed Aggregate: Revealing the Inner Beauty
An exposed aggregate finish reveals the natural beauty of the stones and gravel within the concrete mix. This is achieved by washing away the top layer of cement paste to expose the coarse aggregate. The result is a highly durable and slip-resistant surface with a unique, textured appearance. This finish is a popular choice for driveways, patios, and pool decks.
Polished Concrete: Sleek, Modern, and Low-Maintenance
Polished concrete is a high-end finish that is achieved by grinding the concrete surface with progressively finer diamond abrasives. This process creates a smooth, glossy, and highly reflective surface that is both beautiful and incredibly durable. Polished concrete is a popular choice for commercial spaces, retail stores, and modern homes due to its low maintenance requirements and long lifespan.
Salt Finish: A Subtle, Textured Charm
A salt finish is a subtle and attractive way to add texture and slip resistance to a concrete surface. This is created by pressing rock salt into the wet concrete and then washing it away after the concrete has hardened. The salt dissolves, leaving behind small, shallow pits that create a unique and decorative texture. This finish is often used for pool decks and patios.
Colored Concrete: Adding a Splash of Personality
Color can be incorporated into concrete in several ways to enhance its aesthetic appeal.
- Integral Color: Pigments are added to the concrete mix before it is poured, resulting in a uniform color throughout the entire slab.
- Color Hardeners: These are dry-shake powders that are broadcast onto the surface of the freshly placed concrete and then worked into the surface with a float or trowel. Color hardeners not only add color but also increase the surface strength.
- Stains and Dyes: These are applied to the surface of cured concrete to create a more variegated and translucent color effect. Acid stains react chemically with the concrete to create a mottled, stone-like appearance.
Troubleshooting Common Concrete Finishing Problems
Even with the best preparation and techniques, problems can sometimes arise during the concrete finishing process. Here are some common issues and how to address them:
- Cracking: This can be caused by a variety of factors, including a high water-cement ratio, improper curing, and a lack of control joints.
- Dusting: A powdery residue on the surface of the concrete is often a sign of a weak surface, which can be caused by finishing the concrete with bleed water present or by improper curing.
- Scaling and Spalling: The flaking or peeling of the top layer of concrete is often caused by freeze-thaw cycles, especially in concrete that is not air-entrained.
- Blistering: These are small bubbles that appear on the surface of the concrete and are often caused by troweling the surface too early, trapping air and water underneath.
- Discoloration: Inconsistent coloring can be caused by variations in the concrete mix, inconsistent curing, or the use of calcium chloride as an accelerator.
Safety First: Essential Precautions for Concrete Work
Working with concrete requires a commitment to safety. Wet concrete is caustic and can cause severe skin irritation and burns. Always wear the proper personal protective equipment (PPE), including:
- Waterproof gloves
- Long-sleeved shirt and long pants
- Safety glasses or goggles
- Waterproof boots
It’s also important to be mindful of the weight of concrete and to use proper lifting techniques to avoid injury. When using power tools, always follow the manufacturer’s safety instructions.
The Future of Concrete Finishing: Innovations and Trends
The world of concrete finishing is constantly evolving, with new materials, tools, and techniques emerging all the time. Some of the current trends include:
- Self-leveling overlays: These are thin, polymer-modified cements that can be poured over existing concrete to create a new, smooth surface.
- Decorative saw cuts: These can be used to create intricate patterns and designs in the surface of the concrete.
- Sustainable practices: There is a growing emphasis on using recycled materials in concrete mixes and on using environmentally friendly finishing products.
Conclusion: The Art and Craft of a Perfect Finish
Mastering the concrete finish is a skill that combines technical knowledge with a keen sense of timing and a feel for the material. It’s a craft that requires patience, practice, and a commitment to quality. By understanding the science behind the pour, equipping yourself with the right tools, and following the proper techniques, you can transform a simple slab of concrete into a durable, beautiful, and valuable asset. From the timeless appeal of a smooth trowel finish to the intricate beauty of stamped or polished concrete, the possibilities are as vast as your imagination. So, the next time you embark on a concrete project, remember that the finish is not just the final step; it’s the signature of a true craftsman.