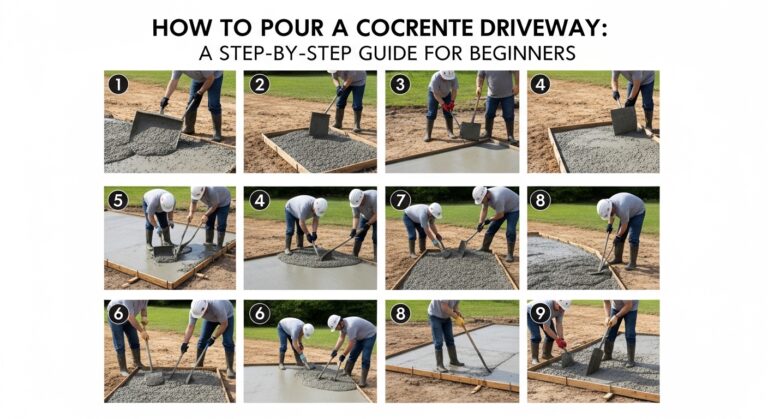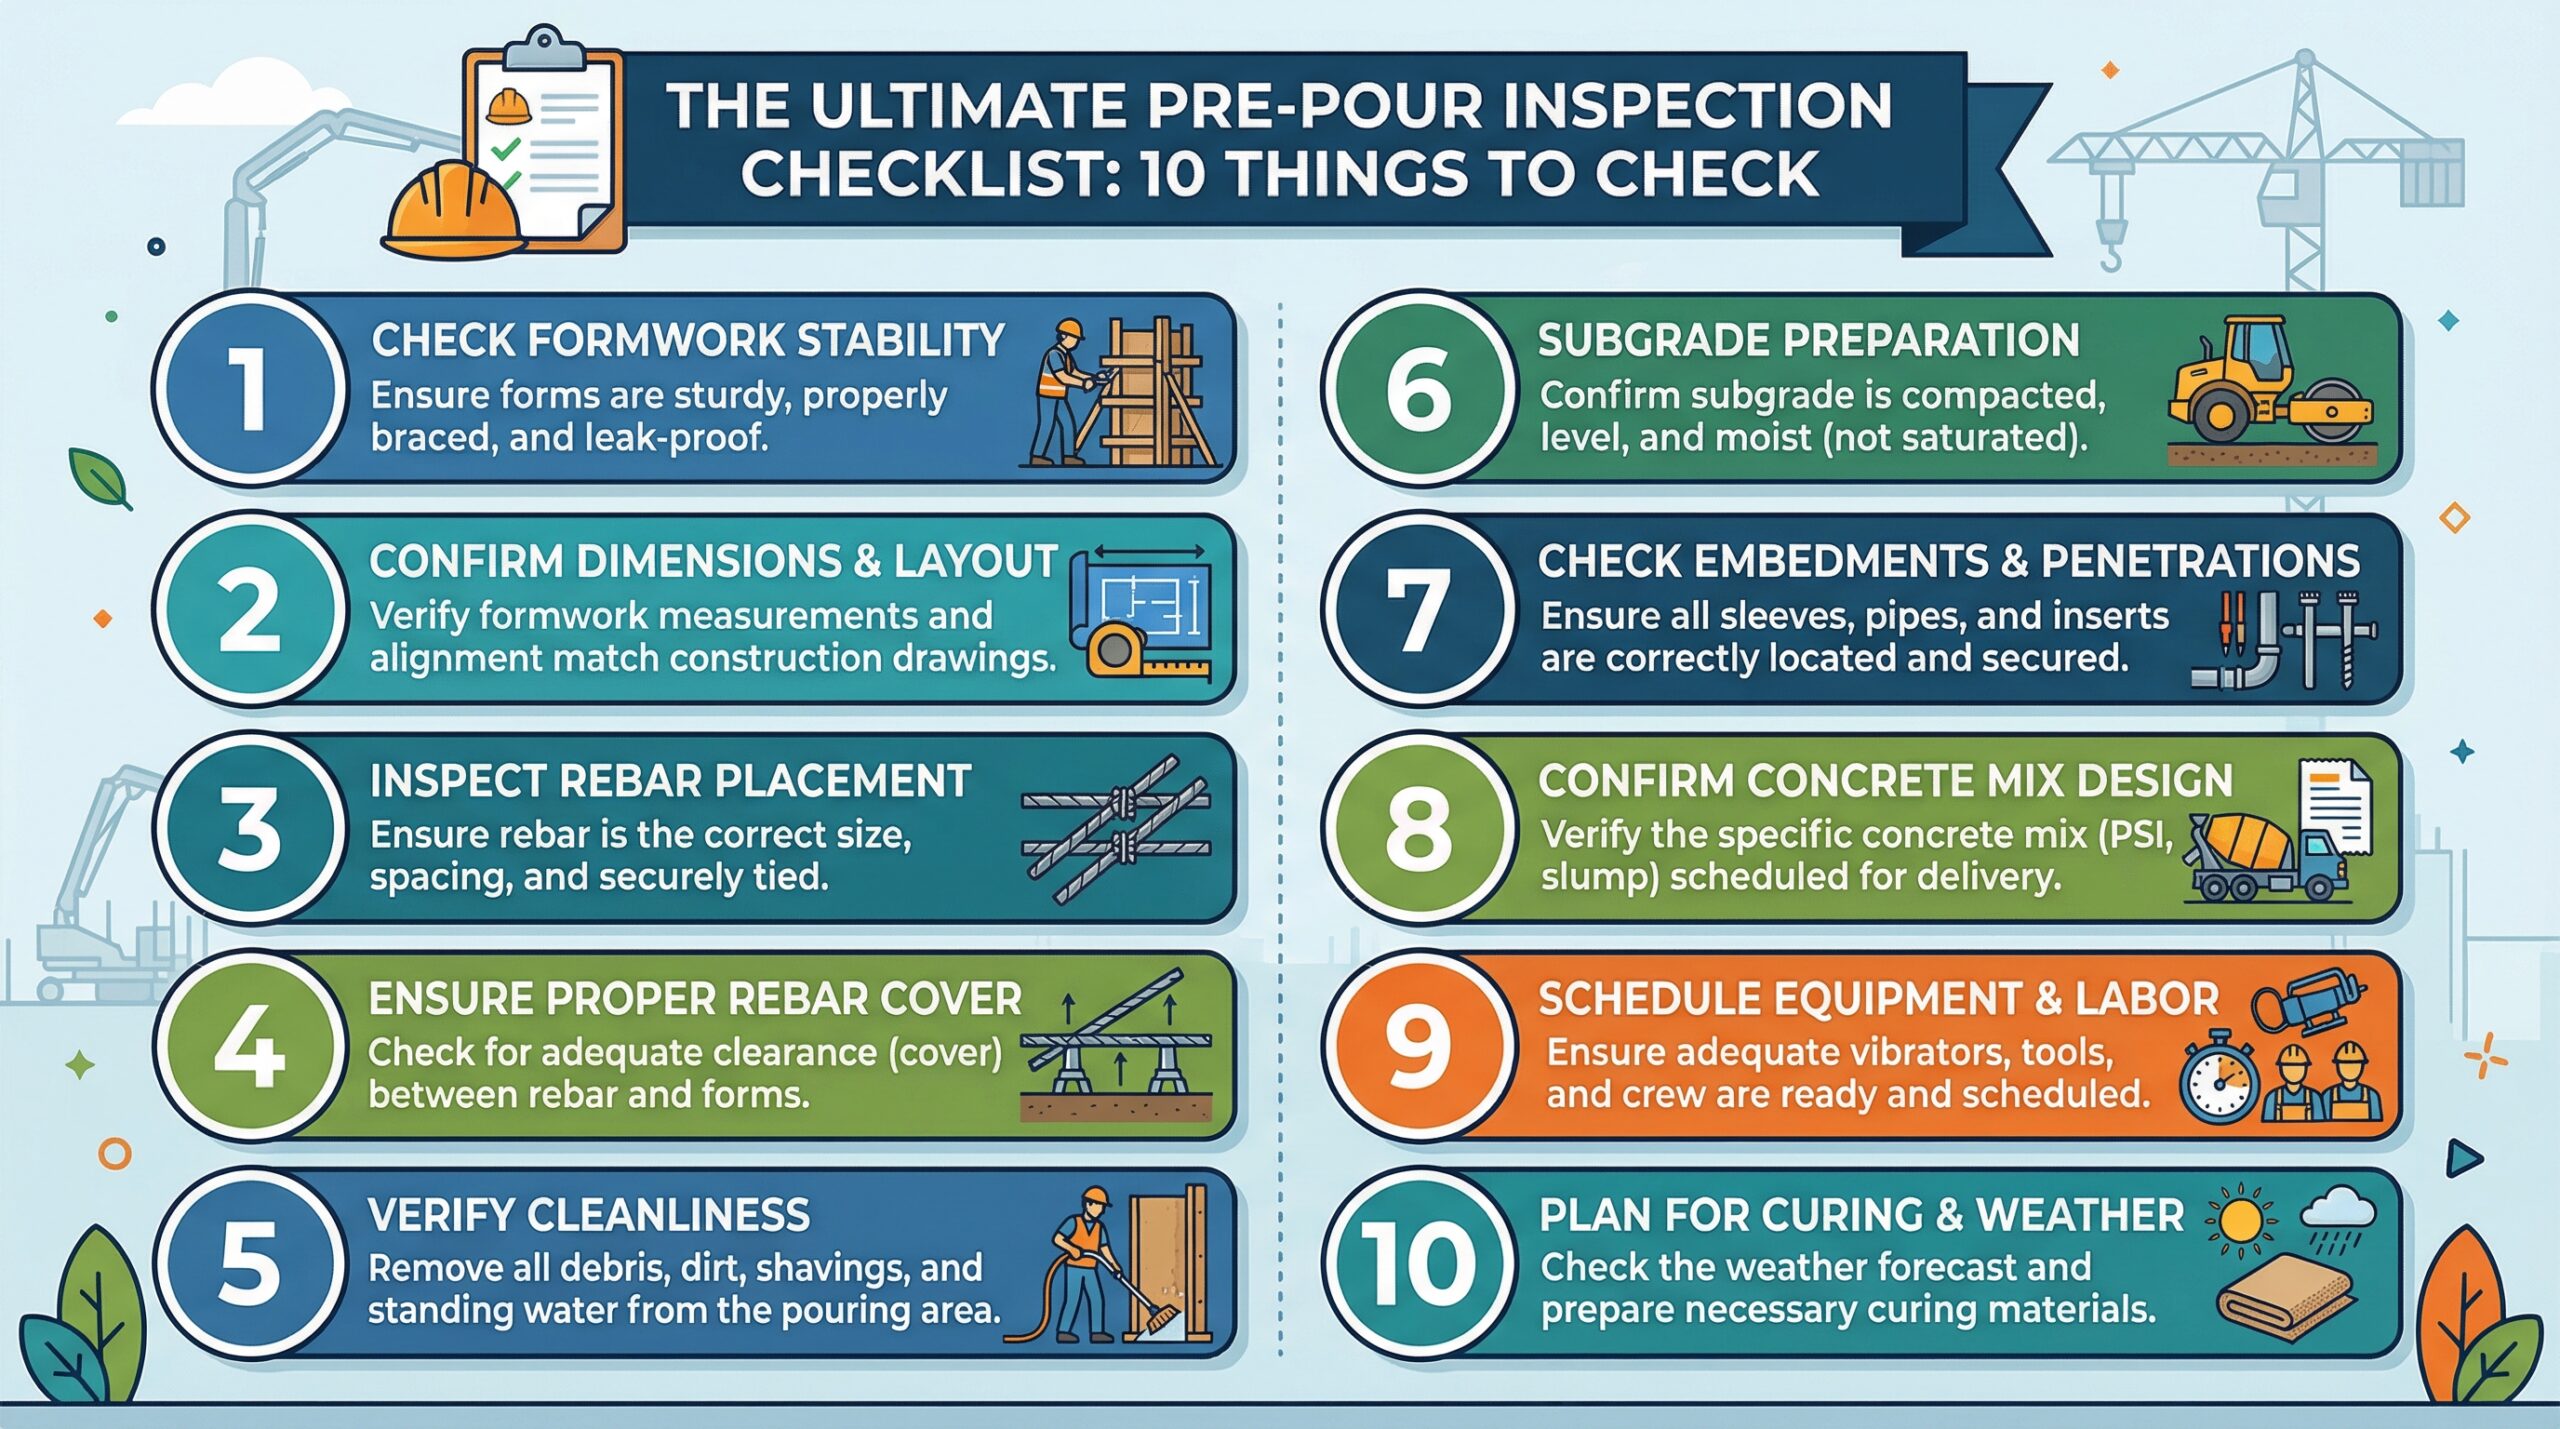
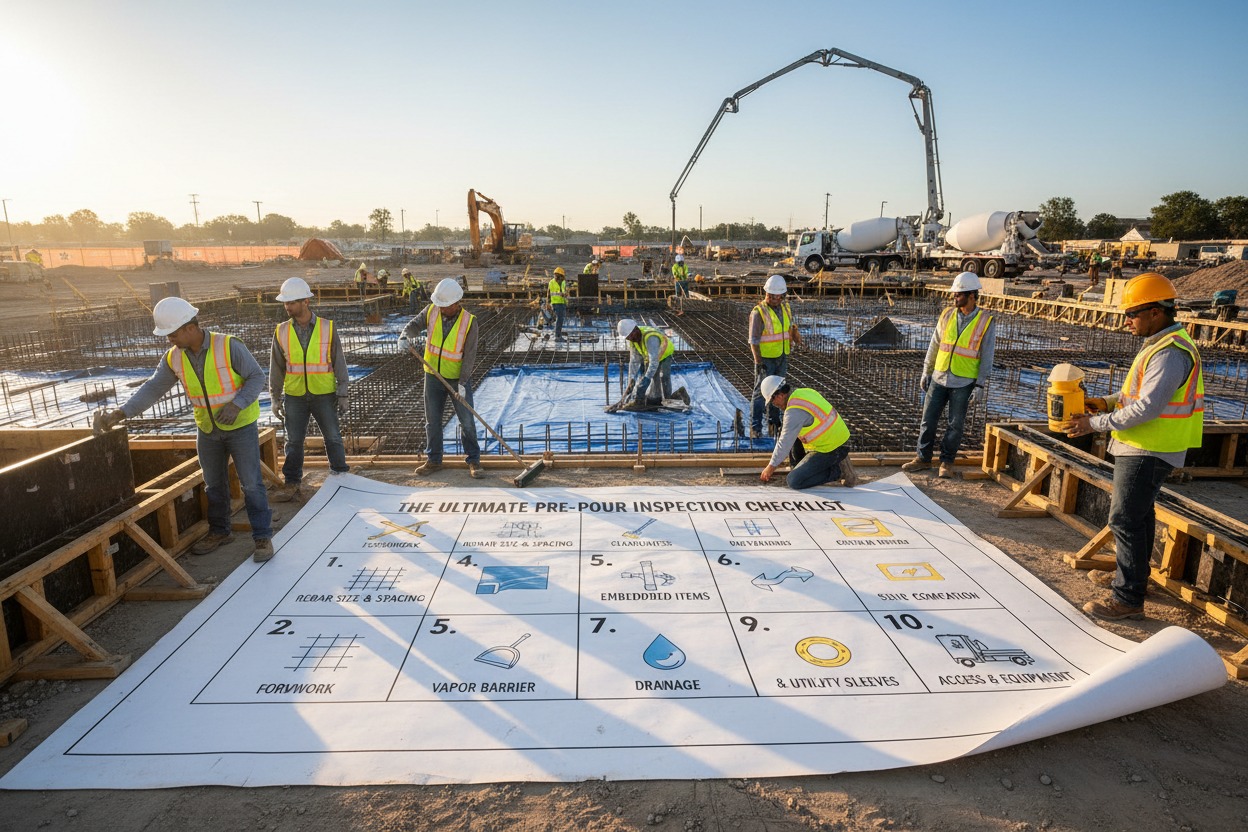
The Ultimate Pre-Pour Inspection Checklist: 10 Things to Check
The Ultimate Pre-Pour Inspection Checklist: The arrival of a concrete truck is a point of no return. Once the “mud” starts flowing, you have a limited window to correct any mistakes. A single forgotten utility sleeve or a loose form board can turn a profitable project into a costly demolition nightmare.
To ensure a smooth pour and a high-quality finished product, every contractor and DIYer should follow a rigorous Pre-Pour Inspection Checklist. Here are the 10 critical items you must verify before you pick up the phone to call the batch plant.
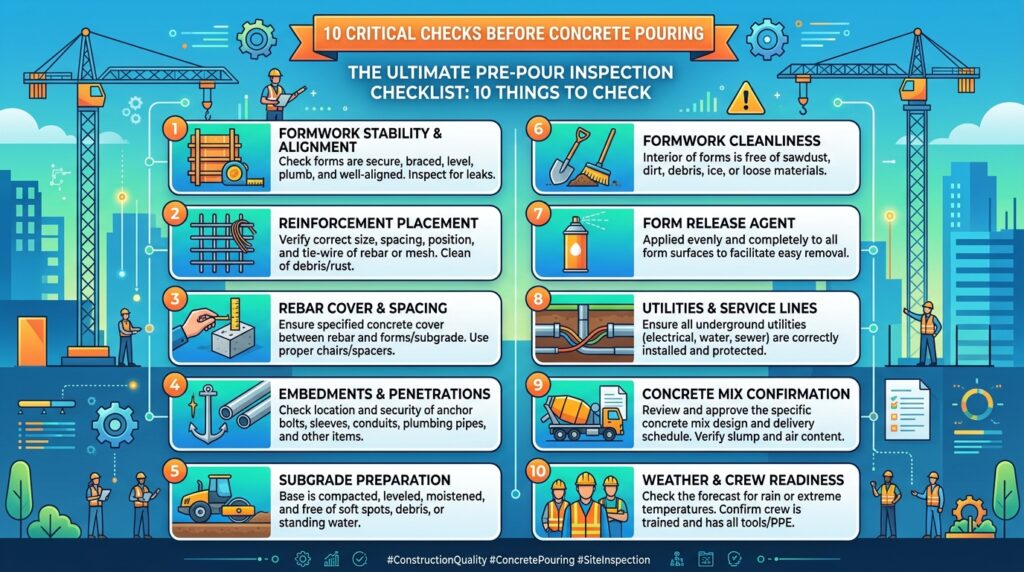
1. Verify Formwork Stability and Alignment
The pressure of wet concrete (hydrostatic pressure) is immense. If your forms aren’t braced correctly, they will “blow out,” sending wet concrete everywhere.
- Check Bracing: Ensure stakes are driven deep and diagonal braces are secured every 3–4 feet.
- String Line Test: Run a string line along the top of the forms to ensure they are perfectly straight.
- Form Release Agent: Ensure the inside of the forms is coated with a release agent so the wood doesn’t stick to the hardened concrete.
2. Subgrade Compaction and Moisture
Concrete is only as strong as the ground beneath it.
- The Thumb Test: If you can press your thumb deep into the soil, it isn’t compacted enough. Use a plate compactor until the base is rock-solid.
- Pre-Wetting: On hot days, lightly mist the subgrade with water. If the ground is bone-dry, it will suck the moisture out of the wet concrete, leading to bottom-up cracking.
[Image: Worker using a plate compactor on a gravel driveway base]
3. Rebar Placement and “Chairing”
Rebar does nothing if it’s sitting on the dirt. It must be suspended in the middle of the slab to provide tension strength.
- Check the “Chairs”: Ensure the rebar is sitting on plastic or concrete “chairs” or “dobies.”
- Tie Wire: Shake the rebar grid. It should be tied tightly enough that it doesn’t shift when workers walk on it during the pour.
- Clearance: Ensure there is at least 2 inches of concrete cover between the rebar and the edge of the forms.
4. Utility Sleeves and Embeds
Once the concrete hardens, you cannot easily add pipes or bolts.
- Sleeves: Are there PVC sleeves for future electrical or plumbing lines?
- Anchor Bolts: If you are building a garage or a wall, ensure the anchor bolts are on-site and the templates are ready.
5. Elevation and Slope Double-Check
Water is the enemy of concrete.
- Laser Level: Use a laser level to confirm the “Top of Slab” elevation.
- Pitch: Ensure the slab slopes away from structures at a minimum of 1/8 to 1/4 inch per foot. Never leave a “birdbath” (a low spot where water pools).
[Image: Engineer using a laser level to check concrete form heights]
6. Expansion Joint Material
Where the new concrete meets an existing structure (like a house foundation or a sidewalk), you must have expansion joint material (felt or foam).
- Isolation: This allows the two different slabs to move independently without cracking each other.
7. Weather Forecast Review
Check the radar one last time.
- Rain: If there is more than a 30% chance of rain, have heavy-duty plastic rolls on-site to cover the fresh pour.
- Extreme Heat: If it’s over 90°F (32°C), ensure you have extra help and perhaps a set-retarding admixture in the mix.
8. Crew and Tool Readiness
Do you have enough “boots on the ground”?
- Manpower: For a standard driveway, you need at least 3-4 people. One to pull the hose, two to screed, and one to float.
- The Tool Kit: Vibrators, screeds, bull floats, and hand tools should be clean and sitting right next to the pour site.
9. Access for the Mixer Truck
A fully loaded concrete truck weighs up to 70,000 lbs.
- Clear Path: Ensure there are no low-hanging branches, soft mud, or narrow gates that will prevent the truck from getting close enough to the pour.
- Washout Area: Identify a spot where the driver can wash out the drum after the pour (check local environmental laws).
10. The Delivery Ticket and Mix Verification
When the truck pulls up, don’t just start pouring. Ask for the “Batch Ticket.”
- Check the PSI: Does it match your order (e.g., 3,000 vs 4,000)?
- Batch Time: If the concrete has been in the truck for more than 90 minutes, it may have already started its initial set and should be rejected.
Summary Checklist Table
| Item | Status | Notes |
| Forms Braced | [ ] | Check stakes and string line. |
| Rebar on Chairs | [ ] | Minimum 2″ clearance. |
| Subgrade Wet | [ ] | Mist with water if hot/dry. |
| Expansion Joints | [ ] | Installed against existing slabs. |
| Rain Protection | [ ] | Plastic rolls ready on-site. |
Conclusion
A successful concrete pour is 90% preparation and 10% perspiration. By taking 30 minutes to run through this checklist before the truck arrives, you eliminate the most common causes of concrete failure and ensure a professional, long-lasting result.